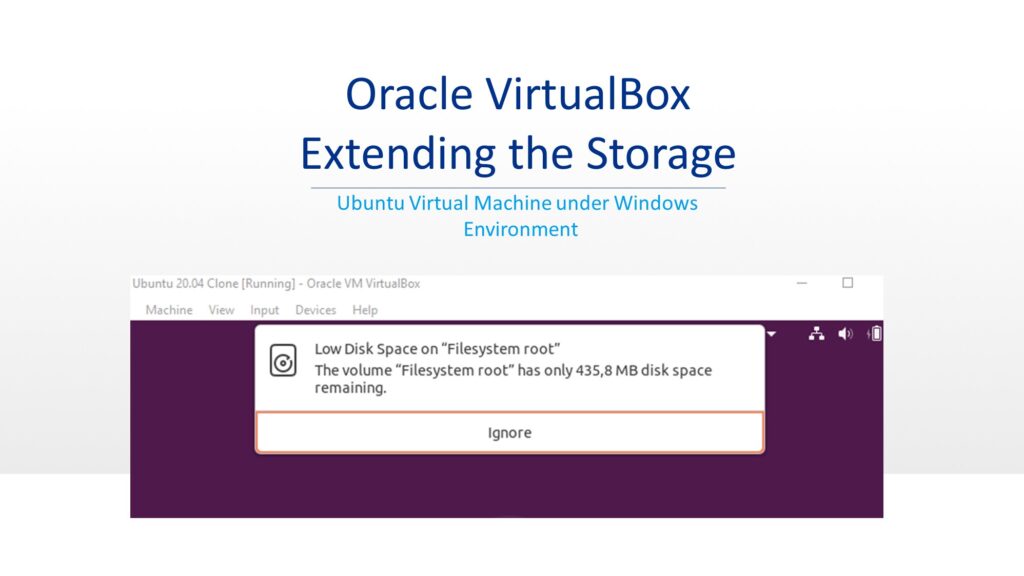
Tinkers who love Windows, installs other operating system virtually, using Oracle VirtualBox. This is very common when we face low storage under these virtual operating systems. Lot of guides are available over the internet describing the method to increase the storage for Virtual Machines. In this guide, we’ll focus on extending the storage for virtual installation of Ubuntu using Oracle VirtualBox.
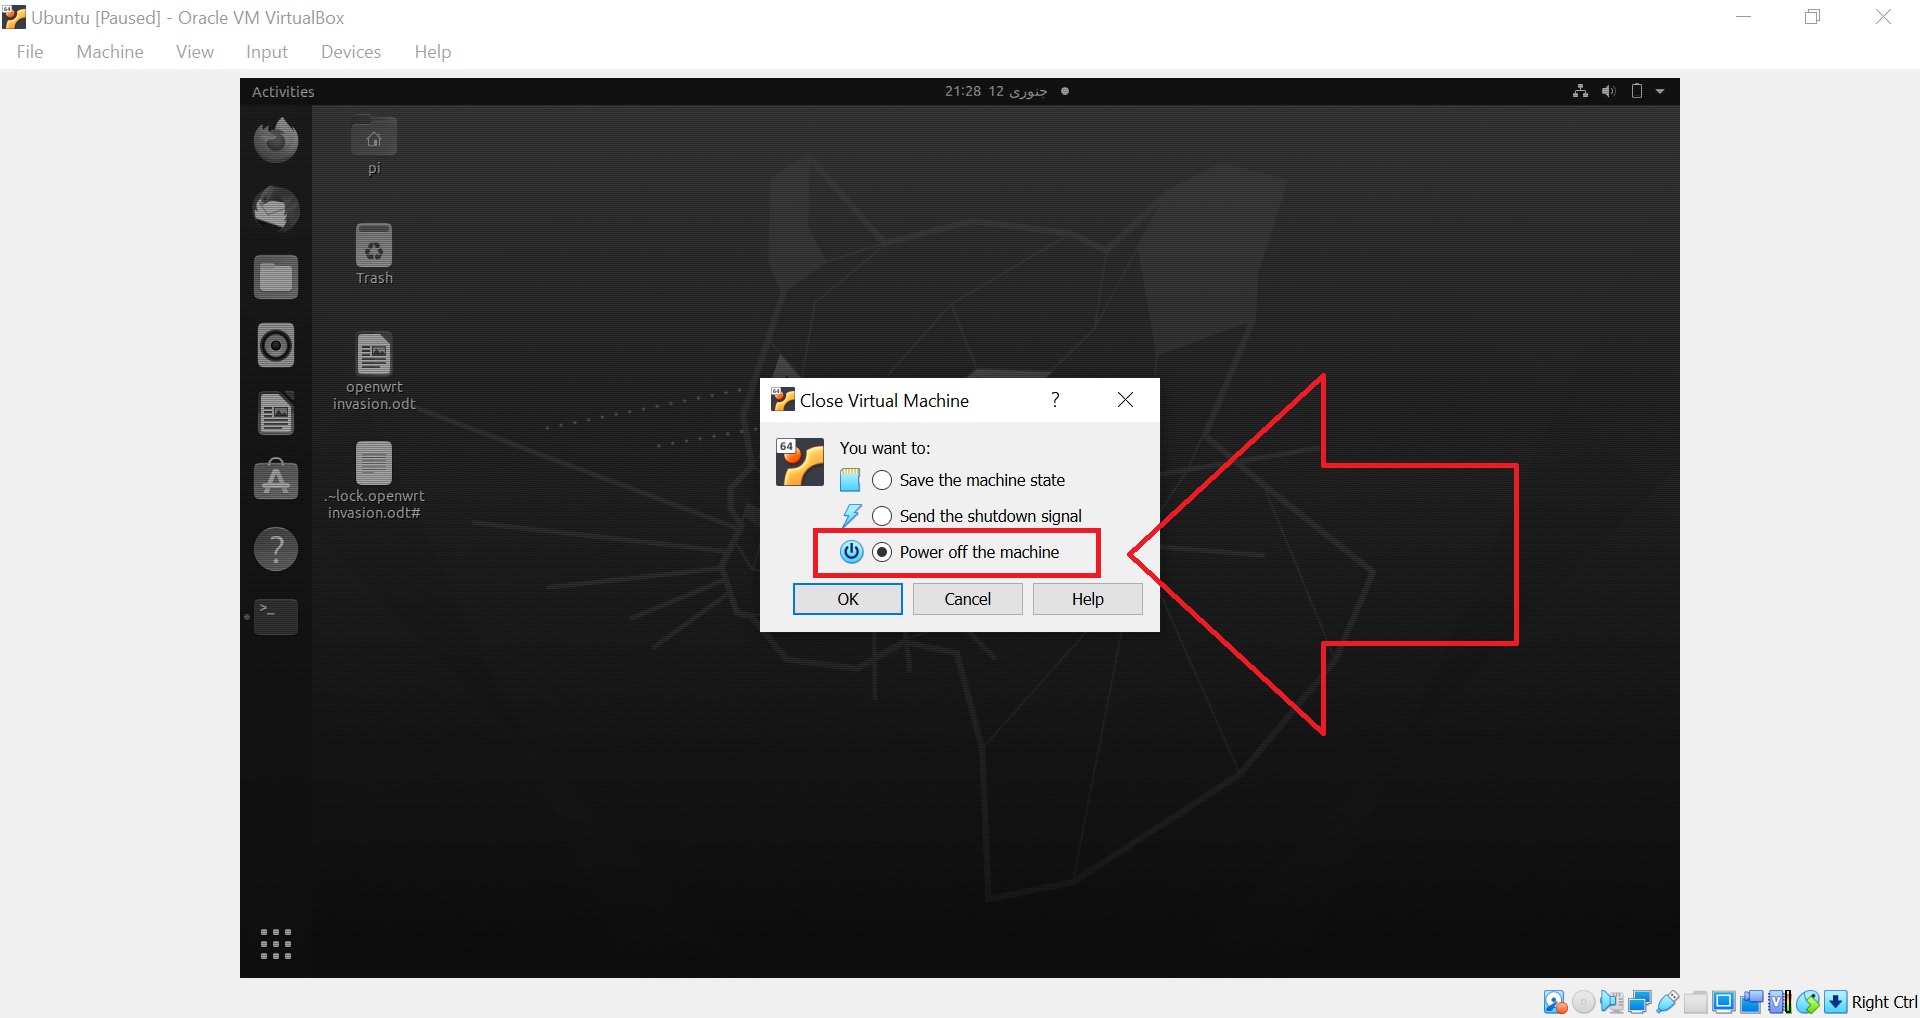
1) Power Down the Virtual Machine:
First of all shutdown the Ubuntu VM using Power off the machine option. Do not practice the Save the machine state option for this purpose.
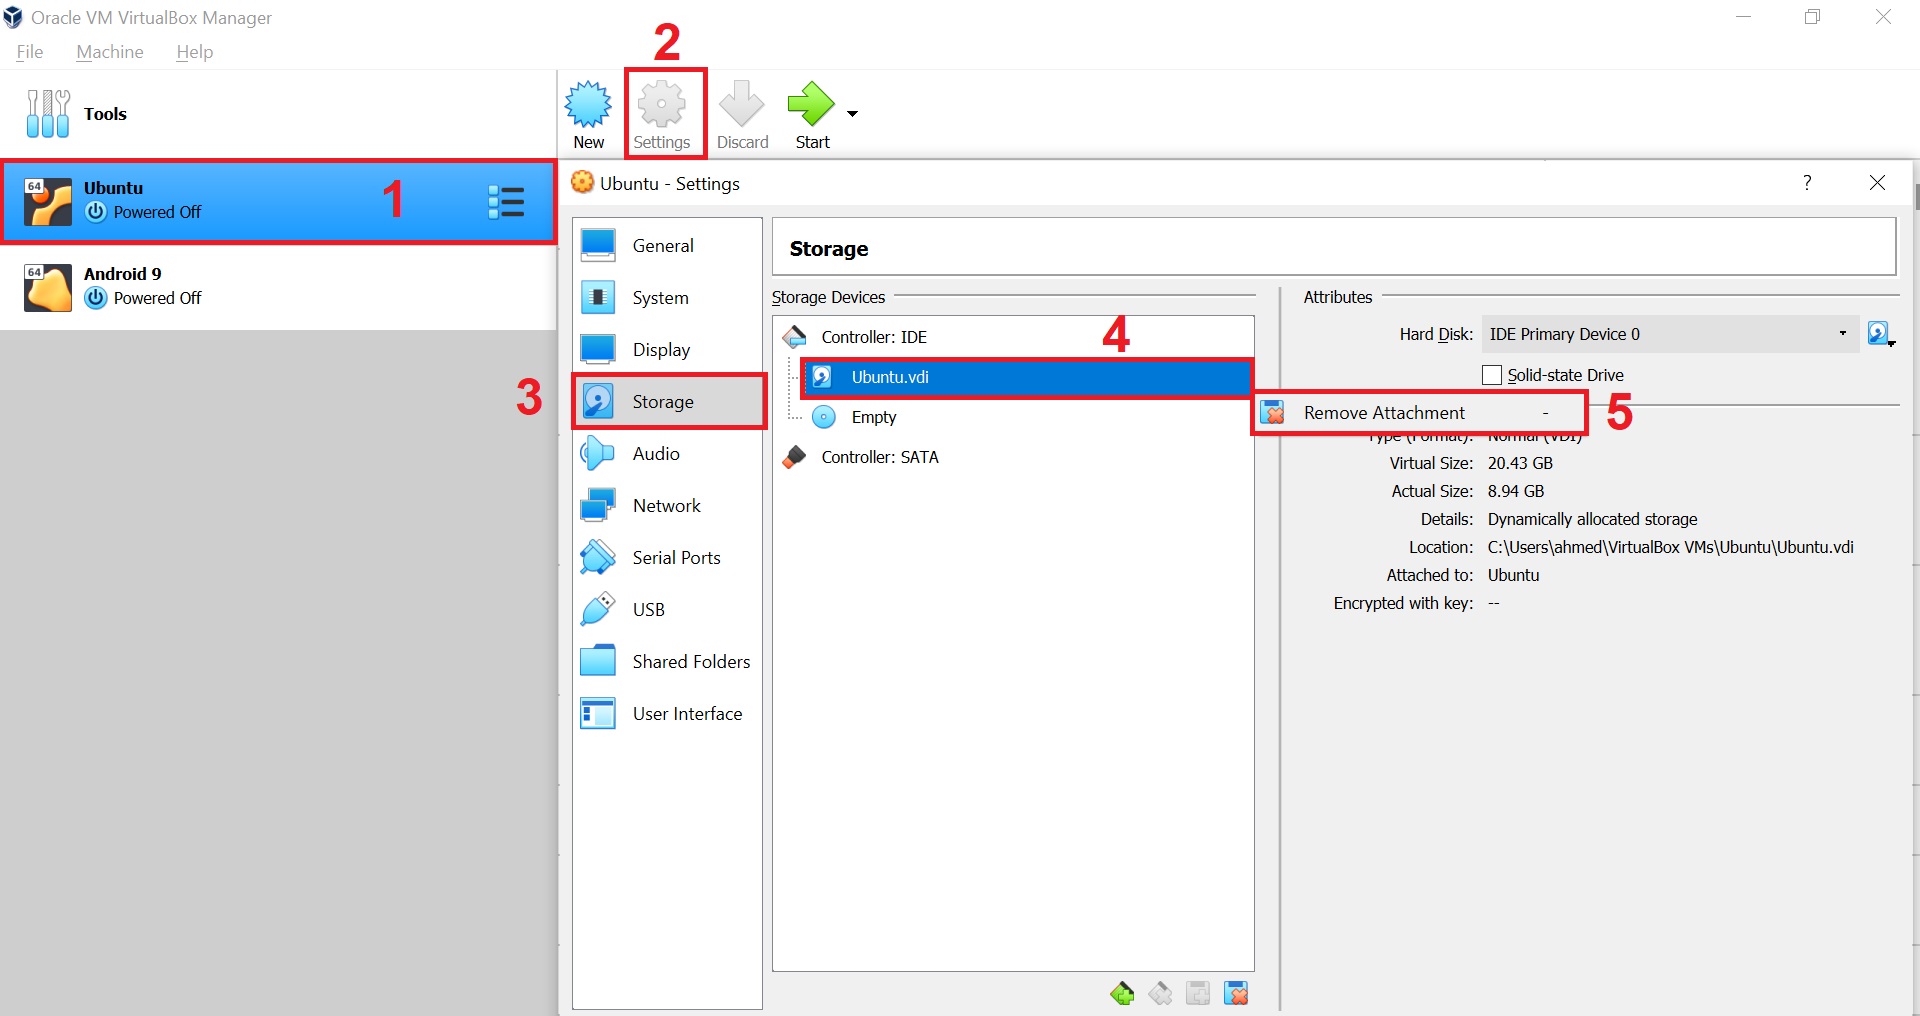
2) Unmounting the volume:
Open Oracle VM VirtualBox Manager and click over the desired Virtual Machine. Go to Settings > Storage. Under Storage Devices, unmount the Controller IDE by Right click and hit Remove Attachment.
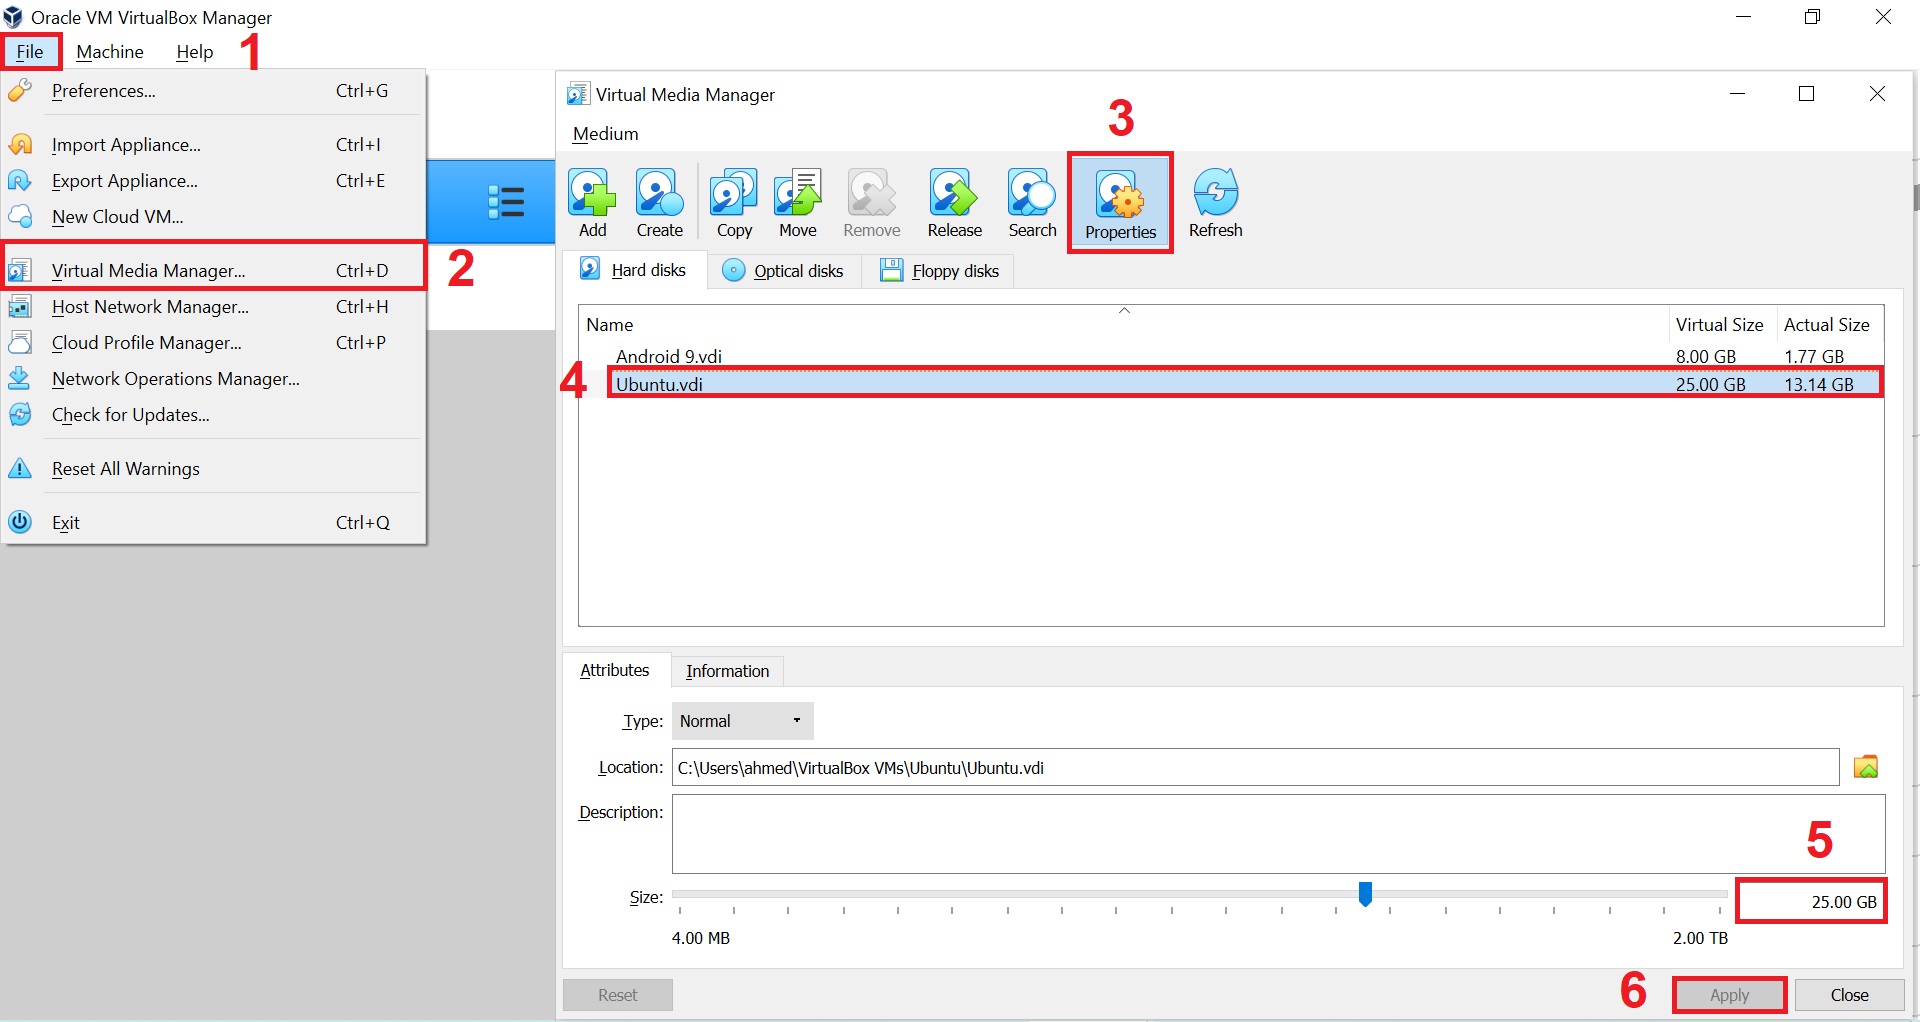
3) Resizing the volume:
In Oracle VM VirtualBox Manager, Go to File > Virtual Media Manager. Make it sure that Properties option is selected. Select the desired media, increase its size and Apply the changes as shown below.
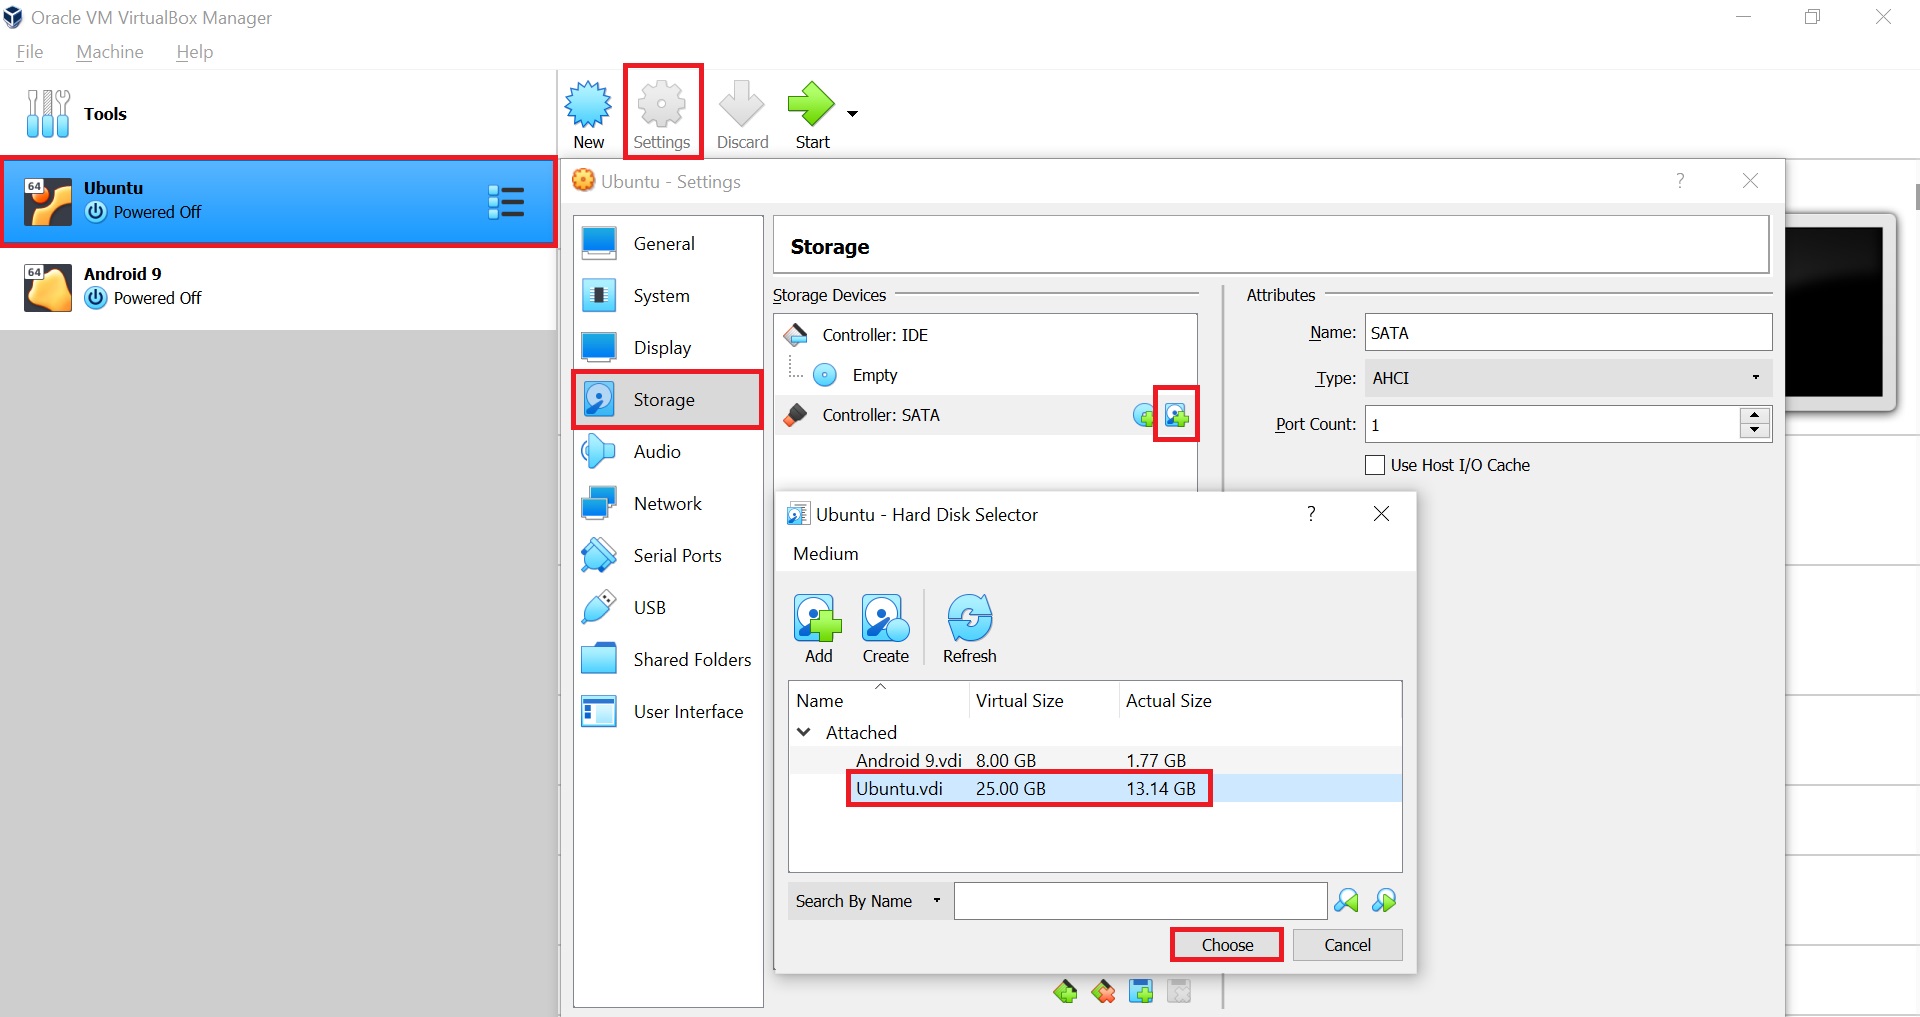
4) Remount the volume:
In Oracle VM VirtualBox Manager, click over the desired Virtual Machine. Go to Settings > Storage. Under Controller: SATA, click Adds hard disk and choose the resized volume.
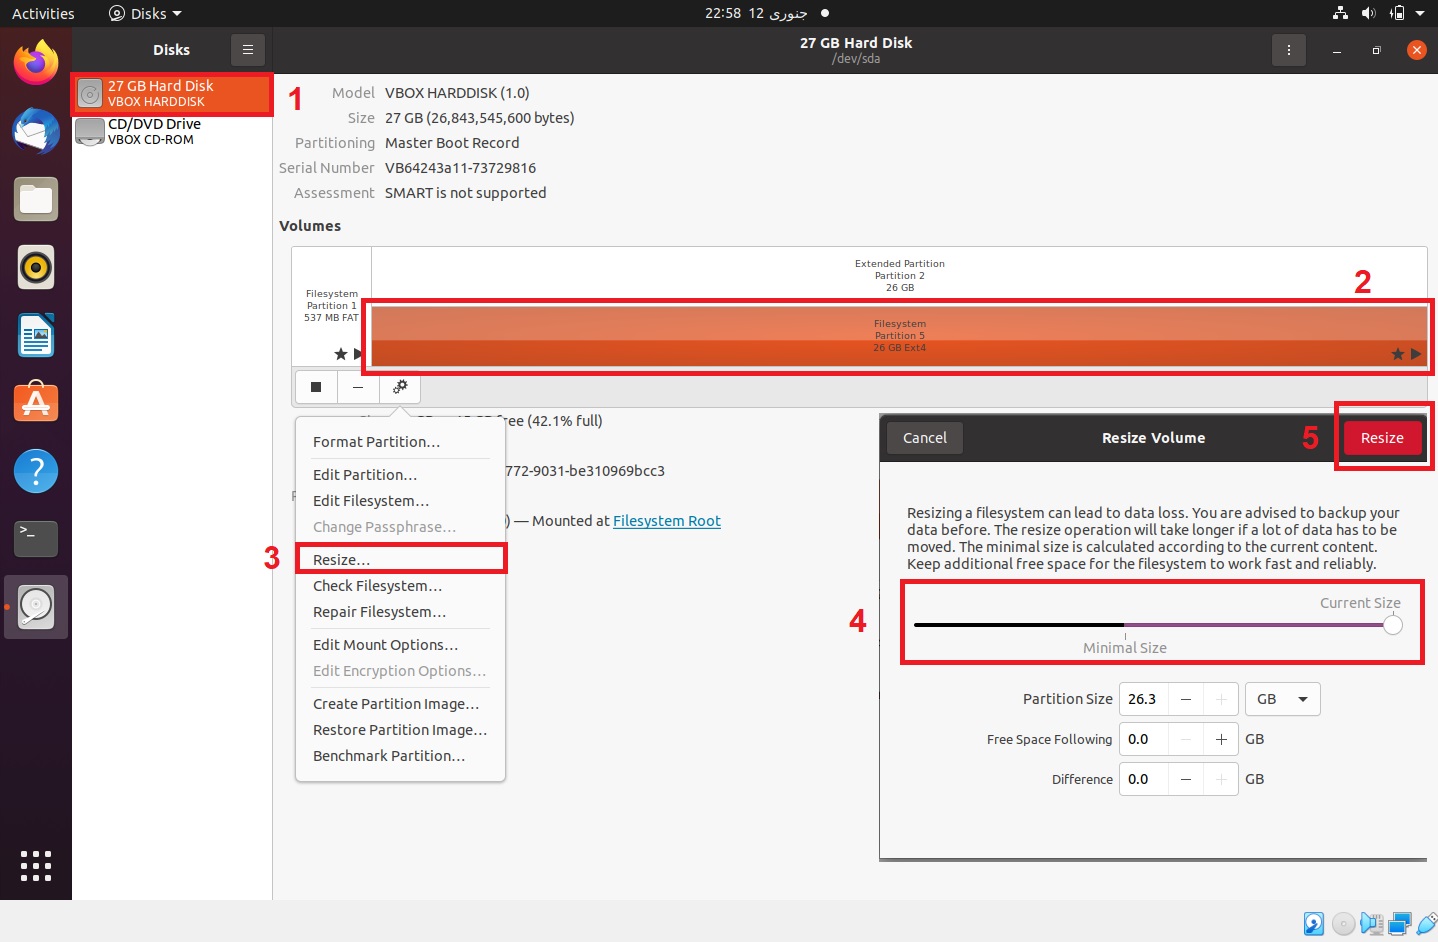
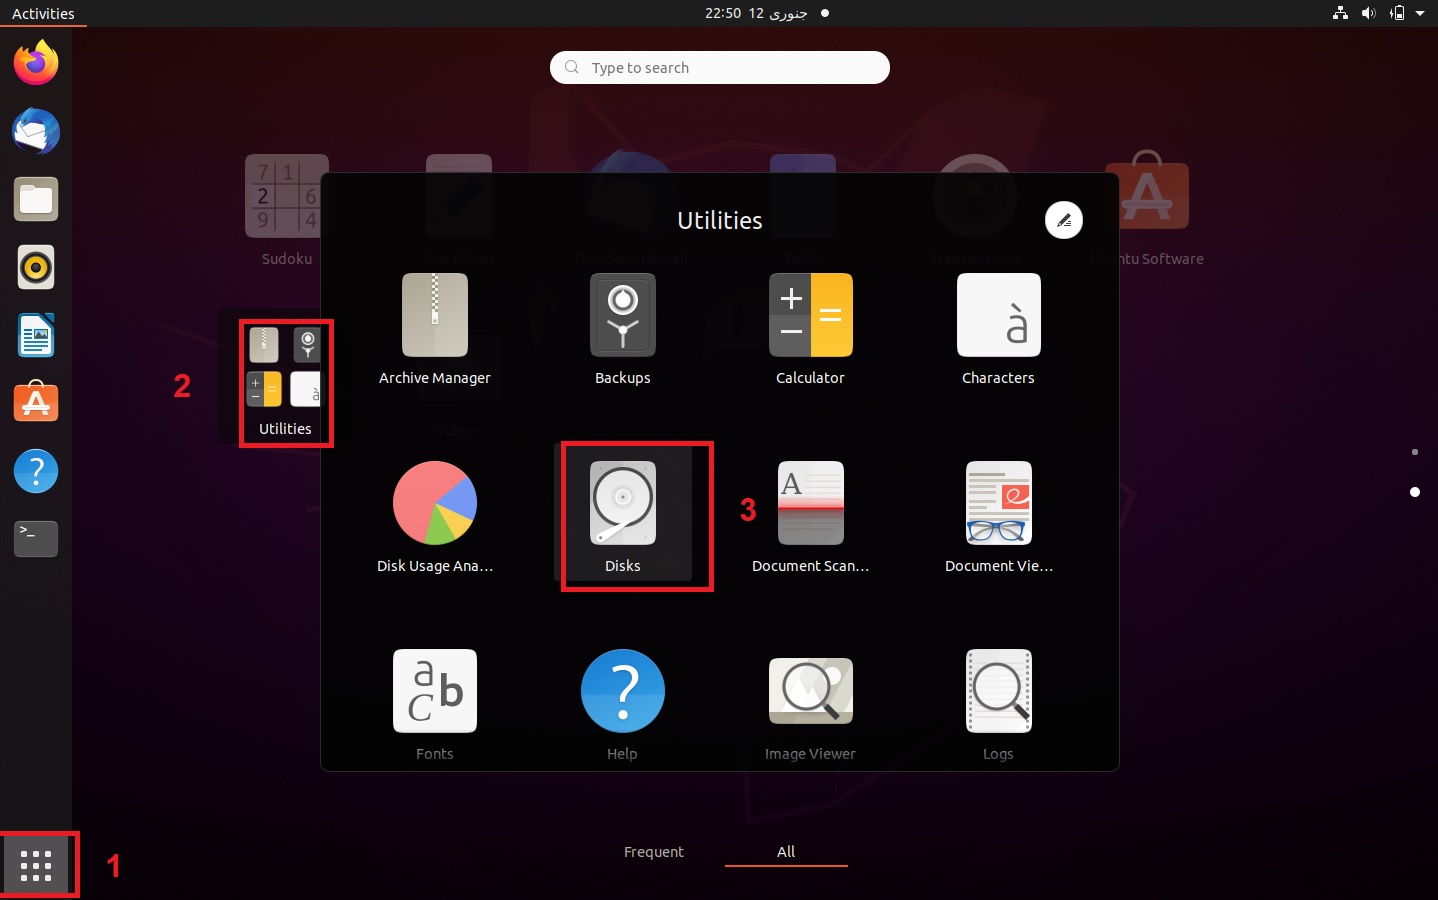
5) Extend the volume under Ubuntu:
Start the Virtual Machine, and navigate to Show Application menu. Open the Disk application which can be found under Utilities folder.
Choose Hard Disk and click over the Filesystem under Volumes. Now click on the little gear button appears on the bottom of volume and hit resize. Under Resize Volume window, move the slider to the right to extend the volume and then click the Resize button. You are done!!