
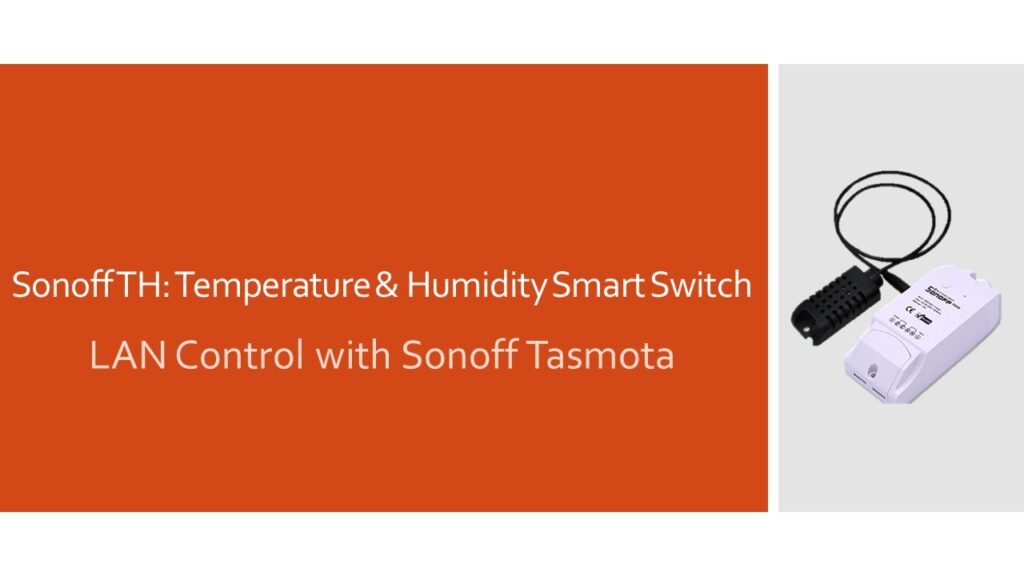
This guide is a part of Domoticz Tasmota: Control Sonoff without Internet and Yeti Tasmota: Control Sonoff without Internet Instantly which require firmware modification by upgrading official Sonoff firmware to opensource Sonoff Tasmota firmware. By installing Tasmota firmware, We’ll be able to achieve local control of Sonoff TH (either TH-10 / TH-16 equipped with temperature & humidity sensor) without internet.
Let’s have a look on the whole process briefly. First We’ll prepare our Sonoff TH to make it ready for connecting it to our computer. Secondly, We’ll back the original firmware up and upload Sonoff Tasmota firmware using our computer and serial adapter. In last, We’ll configure our new firmware a little bit and our TH device will be ready for use.
Contents:
- Sonoff TH Firmware Modification
- – – – Step A – Dissembling
- – – – Step B – Programming Mode
- – – – Step C – Upload Firmware
- – – – Step D – Firmware Configuration
- – – – Step E – Reassembling
Sonoff TH Firmware Modification:
Note: Always unplug the Sonoff device from AC Power Source before start working with it.
Step A – Dissembling:
Unscrew the top smaller lid of Sonoff TH using screw driver and lift the upper lid. Also remove four screws holding the PCB fixed inside. Take the PCB out carefully.
Step B – Programming Mode:
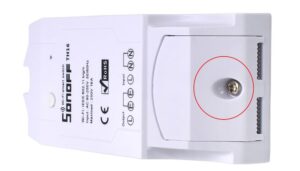
Install a male or female header on holes given for programming the device by soldering it permanently for a firm connection. Header without soldering will result in loose connection and uploading may fail.
Fix the PCB inside enclosure and tighten the screws. Let’s have a look on to the pinout. First pin starts with arrow sign is VCC followed by RX, TX and GND (GND is first pin from LED side of header). Connect FTDI according to the following combinations.
| FTDI | Sonoff TH |
| 3.3V | VCC |
| TX | RX |
| RX | TX |
| GND | GND |

Press the programming button and Plug the FTDI in to PC. Now micro-controller present in our Sonoff TH i.e. ESP8266 will start in programming mode.

Step C – Upload Firmware:
Backup official firmware by following our guide Backup & Restore Official Firmware of Sonoff WiFi Smart Switches under Backup / Download Official Firmware section. After backup, download Sonoff-Tasmota Firmware and upload it according to Upload Official / Third Party Firmware.
Step D – Firmware Configuration:
By short pressing on board button four times, Sonoff Tasmota Firmware allows booting up Sonoff Smart Switches into Wifi Manager Mode providing an Access Point with IP address 192.168.4.1 to configure WiFi credentials. Connect to sonoff-XXXX network and configuration page will open in your browser. If it does not open into your browser automatically, open to http://192.168.4.1 into your favourite browser.
Connect Sonoff TH to your WiFi network according to Configure WiFi Network Settings under Sonoff Tasmota Firmware and configure MQTT parameters by following the instructions given under Configure MQTT Settings under Sonoff Tasmota Firmware. Now Sonoff TH can be accessed by visiting the IP address assigned to it by your WiFi router. Consult your router documentation on how to find the IP address of connected devices. You can also assign a static IP address to your Sonoff device by following instruction given under Set Static IP Address under Sonoff Tasmota Firmware section. By default web page access to Sonoff Tasmota Firmware is open and anyone connected to WiFi network can access to it. Let’s secure web access page by setting up Web Admin Password according to Configure Web Admin Password under Sonoff Tasmota Firmware. Change the module type according to Configure Module Type under Sonoff Tasmota Firmware and choose a correct sensor e.g. Si7021 under Sensor drop down menu otherwise there will be no sensor data fetched out of the sensor.
Now You have completed almost all necessary configuration of Sonoff Tasmota. You can also set default Power on State which will be followed on Sonoff device restart, among ON, OFF and KEEP according to Configure Power On State After Boot Up. Correct Timezone and NTP Server configurations are necessary for timer related functions. However, It is recommended to configure NTP Server and Timezone according to instructions given in Configure NTP Server and Timezone.
Step E – Reassembling:
Now our Sonoff TH is ready for the work. Unplug the FTDI from Sonoff TH and reassemble it by joining both lids carefully. Now Plug in the Hot and Neutral wires and voila!!. You can read temperature and humidity and toggle any electronic gadget (within applicable Watt range) ON & OFF by visiting the IP address assigned to Sonoff TH by router. But the smarter way to toggle a switch is discussed in our guide Domoticz Tasmota: Control Sonoff without Internet. Navigate to Step E – Connect & Control the devices to proceed further if you are already following the steps in our guide Domoticz Tasmota: Control Sonoff without Internet.
Now you can also control your Sonoff TH and read sensor data directly (however, limited in functionality) using Yeti Smart Phone app. There is no need to establish your own Raspberry Pi server as Yeti connects to your Sonoff directly using WiFi network. Follow our guide Yeti Tasmota: Control Sonoff without Internet Instantly for step by step procedure.
Your article does not make it clear if this modification will control the output of the device relative to the temperature
This article is a part of a series of other articles. Just read the steps carefully to get it working. You can also seek help from our technical department (paid services), navigate to https://hobbytronics.pk/product-category/services.