
Error: Contact form not found.
Error: Contact form not found.
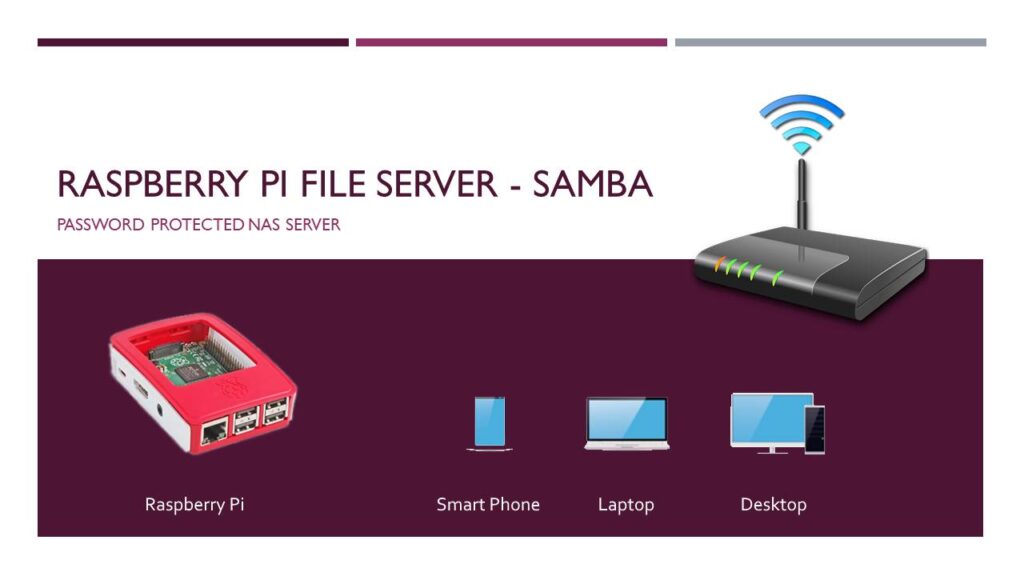
Samba is a free software re-implementation of the SMB/CIFS networking protocol which turns your Raspberry Pi into a media server to back up and share content from anywhere on your local network. Adopt the following procedure to get your password protected Raspberry Pi media Server set up for you.
Contents:
- Install Samba Media Server
- Configuring Samba to share folders
- OTA Update Server for ESP8266
- Creating User Access
- Attaching external HDD / SSD
- Miscellaneous commands
- Uninstalling Samba
Install Raspberry Pi Media Server SAMBA:
sudo apt-get install samba samba-common-bin
Configuring Samba to share folders:
Create a shared folder by typing the following command. It will create a new folder with Read & Write permission.
sudo mkdir -m 1777 /backup
Edit the samba configuration file in nano editor.
sudo nano /etc/samba/smb.conf
Add the following contents in the end of file to share our “backup” folder to our local network.
[backup]
Comment = Raspberry Pi shared folder
Path = /backup
Browseable = yes
Writeable = Yes
only guest = no
create mask = 0777
directory mask = 0777
Public = yes
Guest ok = yes
Save the configuration file by pressing “Ctrl” and “X” key followed by “Y” and “Return” key. After that add user Pi to gain access to Pi File System through Samba.
OTA Update Server for ESP8266:
For OTA updates delete the previous configuration file and create new file by pasting the contents of Samba-Configuration file in to nano editor by clicking “Right Mouse Button”.
sudo rm /etc/samba/smb.conf
sudo nano /etc/samba/smb.conf
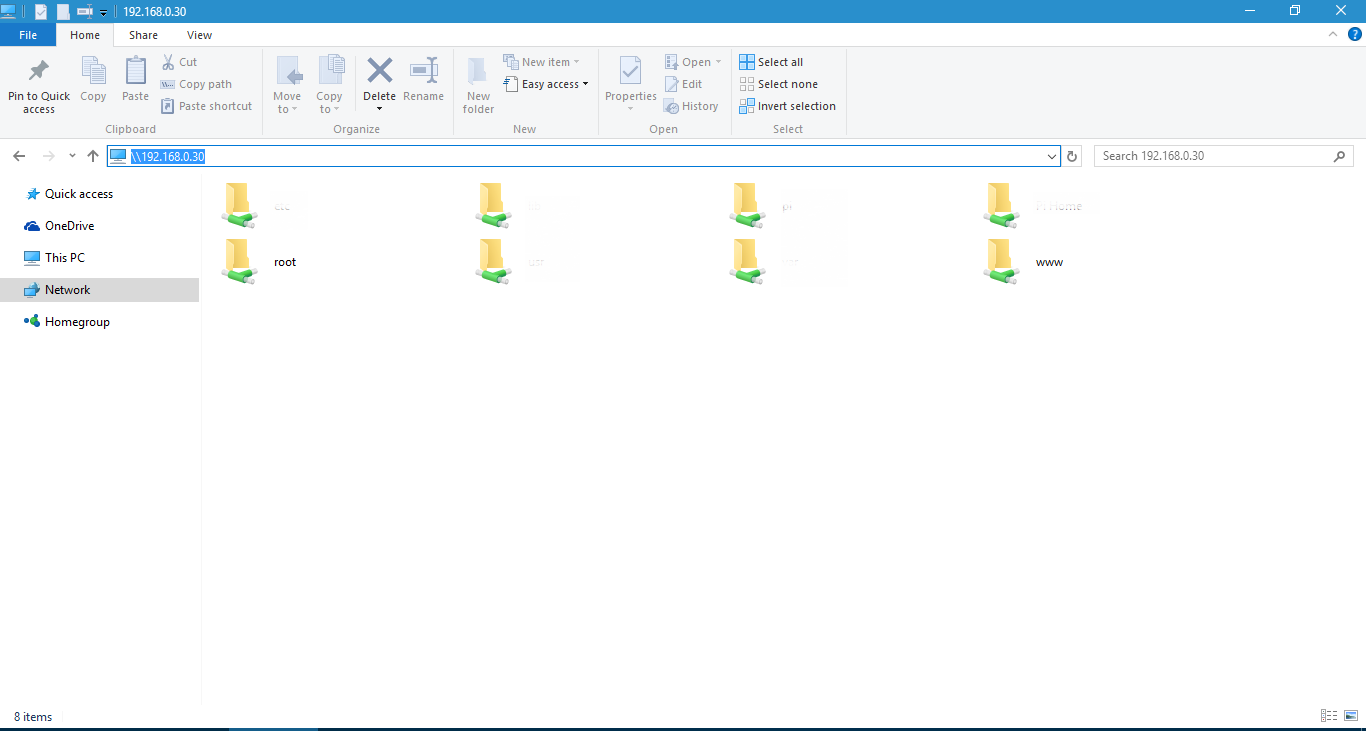
Save the configuration file by pressing “Ctrl” and “X” key followed by “Y” and “Return” key. There will be two folders available, namely “root” and “www”. “www” is the folder where we’ll upload our OTA update binary files.
Creating User Access:
Add user Pi to gain access to Raspberry Pi File System through Samba.
sudo smbpasswd -a pi
By issuing the command above, system will ask for password, type your password, press “Return” key, retype the same password and again press “Return” key. Now open the IP address of your Pi in your computer “Windows Explorer”. For example;
\\192.168.0.30
Attaching external HDD / SSD:
Raspberry Pi 4 has USB 3.0 support built-in and a hard disk drive or solid state drive can be attached with it to increase the storage capacity. Format the drive in NTFS file system and attach it to Raspberry Pi 4. Install ntfs-3g driver if not installed earlier by the following command.
Installing the driver:
sudo apt update
sudo apt install ntfs-3g
List all the disks:
sudo lsblk -o UUID,NAME,FSTYPE,SIZE,MOUNTPOINT,LABEL,MODEL
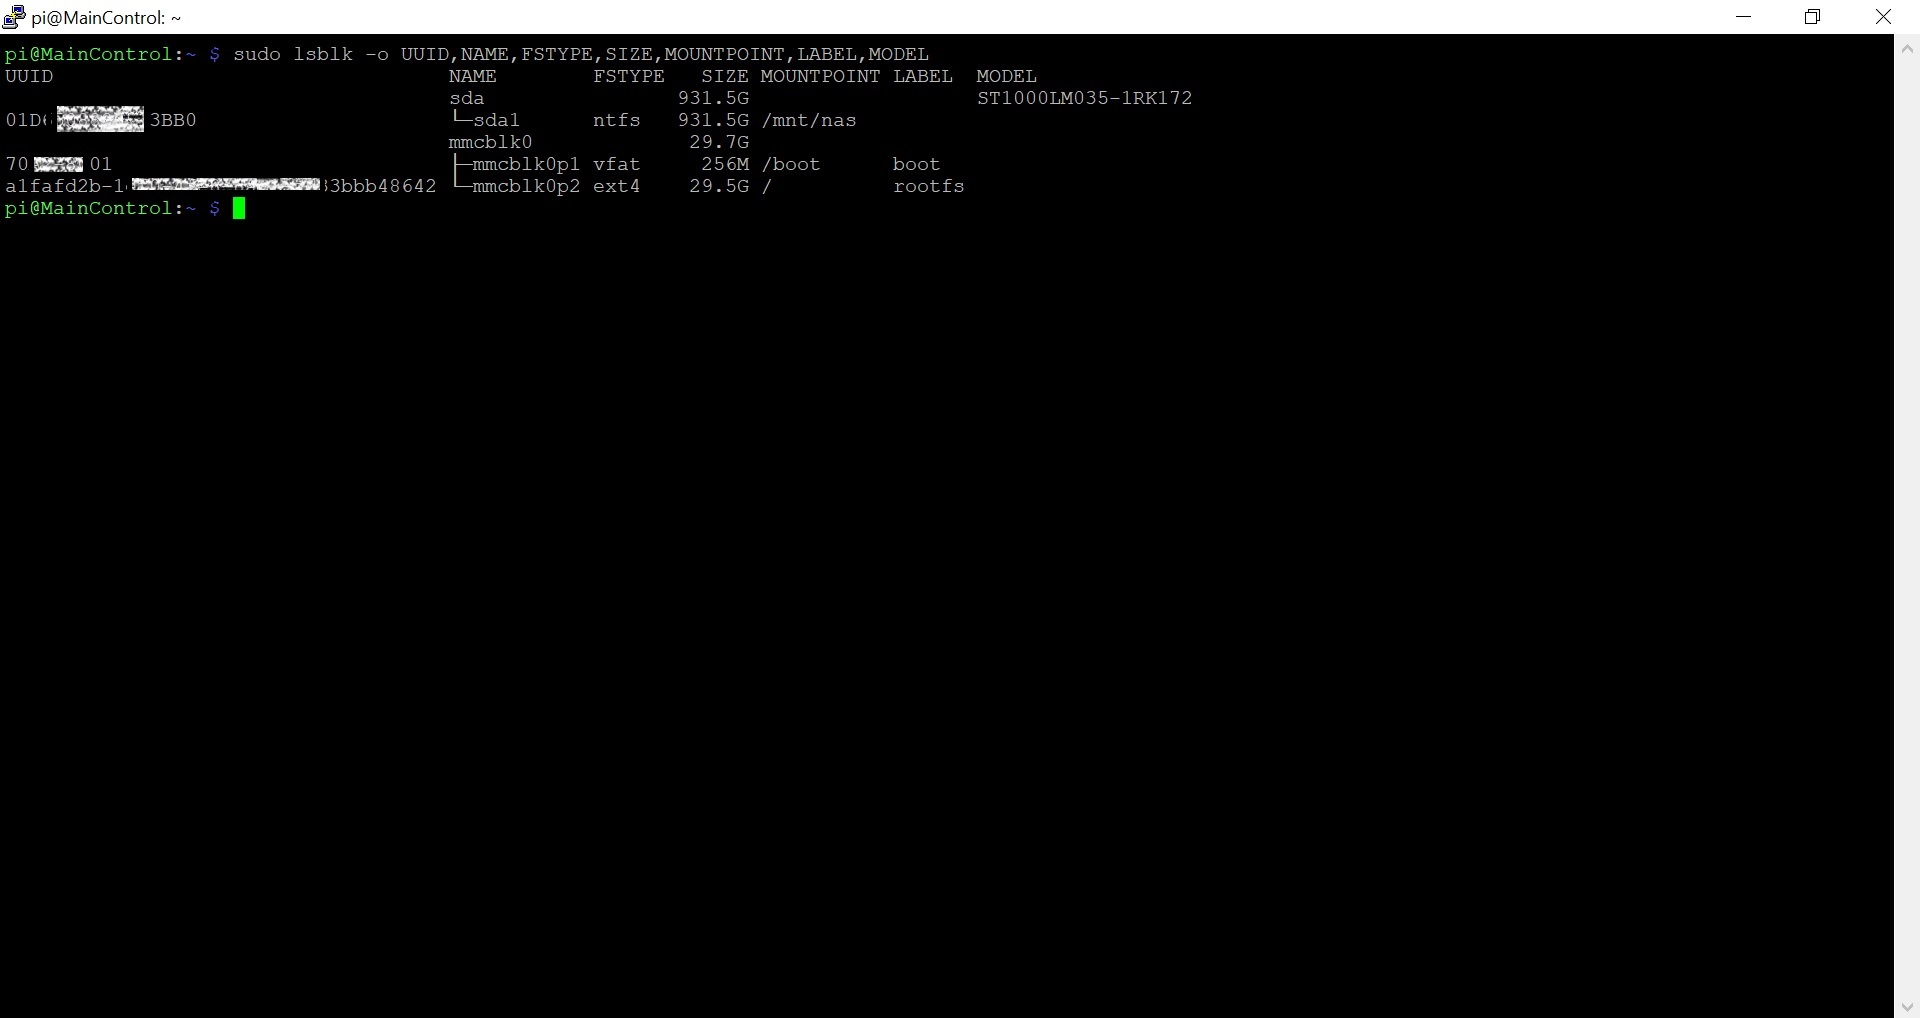
Identify the name of the disk partition that points to your storage device using the size, label or model columns, e.g. sda1.
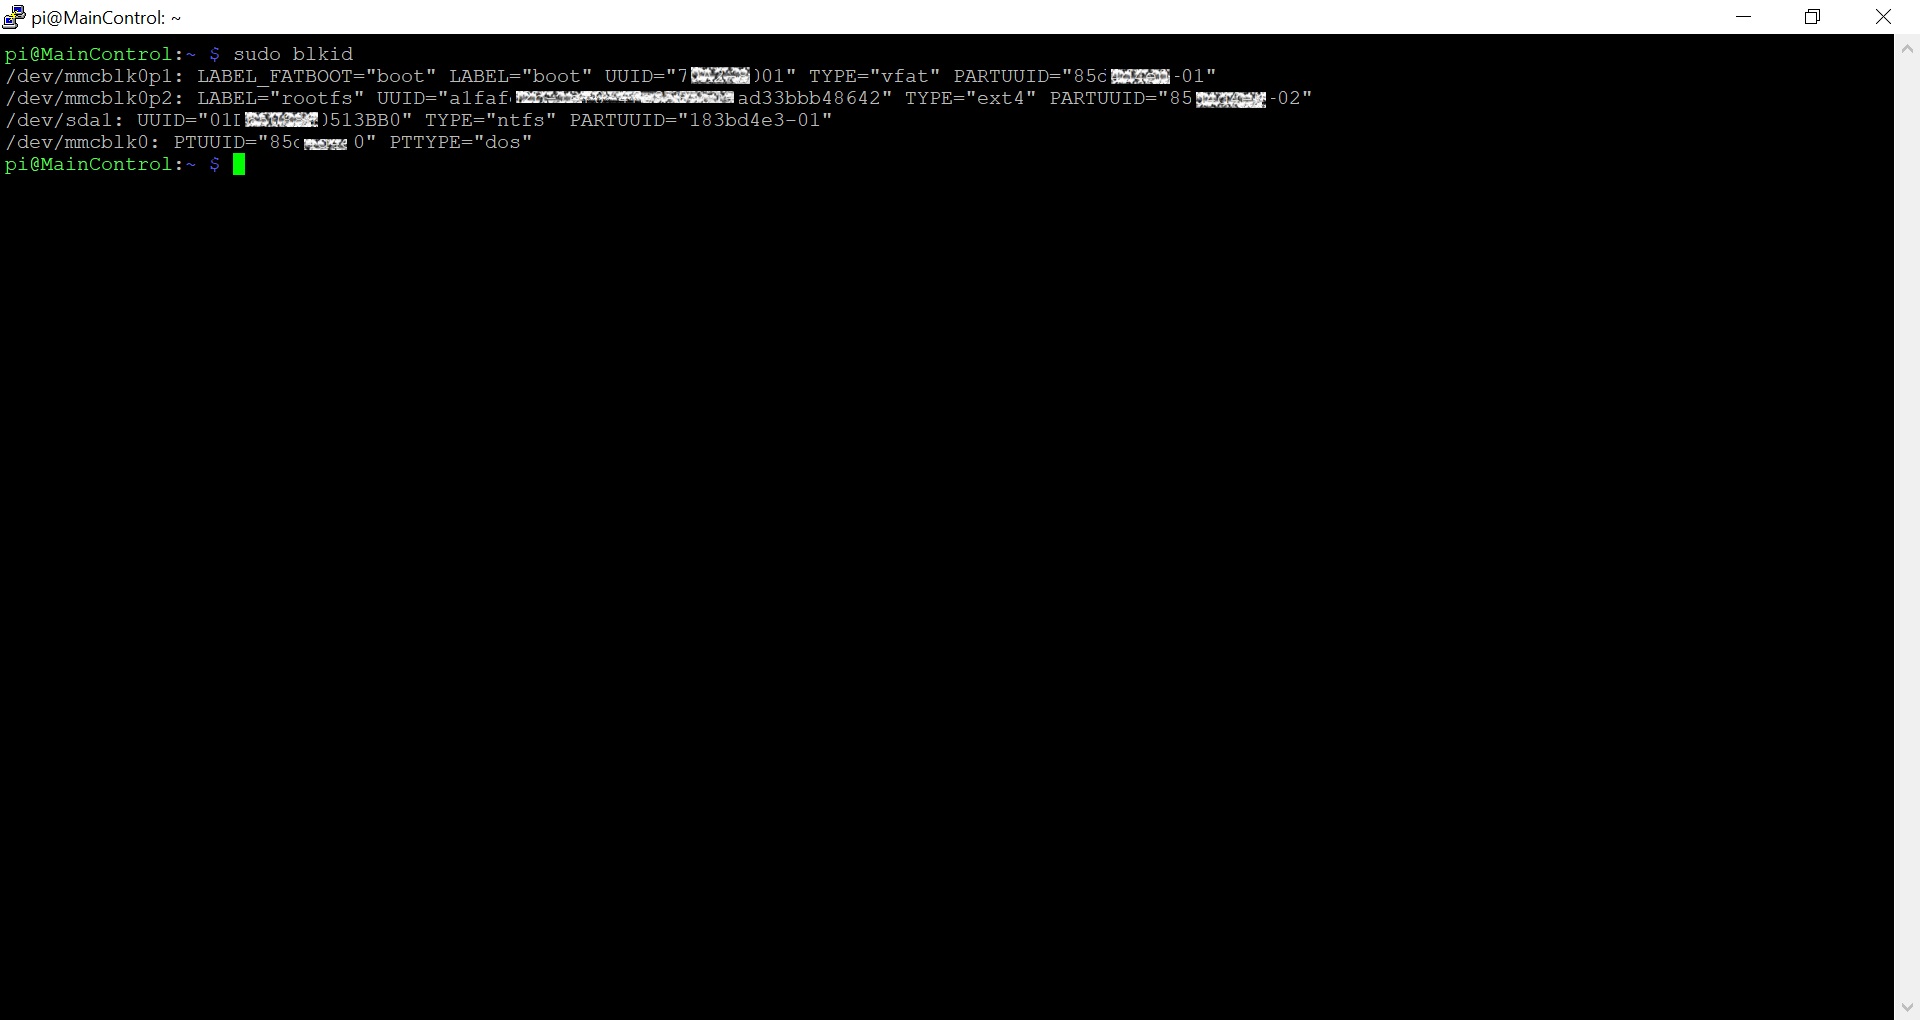
Get the location of disk partition using the command below e.g. /dev/sda1.
sudo blkid
Create Target Folder / Mount Directory:
Create a target folder to attach the drive.
sudo mkdir /mnt/nas
Change the permissions to allow access to the drive.
sudo chmod 770 /mnt/nas
Mounting the drive:
In order to mount the drive manually, use
sudo mount /dev/sda1 /mnt/nas
Verify if the mount is successful.
ls /mnt/nas
Unmounting the drive:
In order to remove the external drive for any reason, first unmount the drive by
sudo unmount /mnt/nas
Automatic mounting the drive:
When the Raspberry Pi will reboot, you have to mount the drive manually using the command above, or you can use fstab to automate the mounting. We need UUID, for this purpose and can be obtained by the command below.
sudo blkid
Open the fstab in nano editor.
sudo nano /etc/fstab
Add the following line in the end of the file.
UUID=0X6XX508XXX513BB0 /mnt/nas ntfs-3g defaults,auto,users,rw,nofail,umask=000 0 0
Please note, change the UUID with your own UUID obtained by sudo blkid. Save the file using Ctrl + X followed by Y and enter and reboot the Pi.
sudo reboot
For more information visit External storage configuration under Raspberry Pi Official Documentation.
Miscellaneous commands:
Stop Samba:
sudo systemctl stop smbd.service
Start Samba:
sudo systemctl start smbd.service
Restart Samba:
sudo systemctl restart smbd.service
Uninstalling Samba:
sudo apt-get autoremove samba