
Visit our new tutorial “Raspbian Stretch Headless Setup on Raspberry Pi Zero, Zero W, Pi 3“ which is easier but it works for Raspbian Stretch and does not work on previous versions of Raspbian such as Raspbian Jessie.
Contents:
- Accessing Raspberry Pi on first boot
- Assigning Static IP address to Raspberry Pi
- Connecting to WiFi Access Point using Terminal
Normally new installation of Raspberry Pi needs Mouse, Keyboard and Display for configuring Raspbian Jessie especially when there is no network i.e. Router or Access point already established. But these are the requirements no more as Raspbian Jessie comes with SSH pre-enabled. As both Raspberry Pi and PC both do not have IP address configured by default and cannot communicate to each other, A DHCP (Dynamic Host Configuration Protocol, automatically provides an Internet Protocol (IP) host with its IP address and other related configuration information such as the subnet mask and default gateway) server is required to be installed on PC. DHCP server for Windows perform this job with ease, just follow the steps below.
Step A:
- Go to Network and Sharing Center by searching in start menu.
- Click on Change adapter settings.
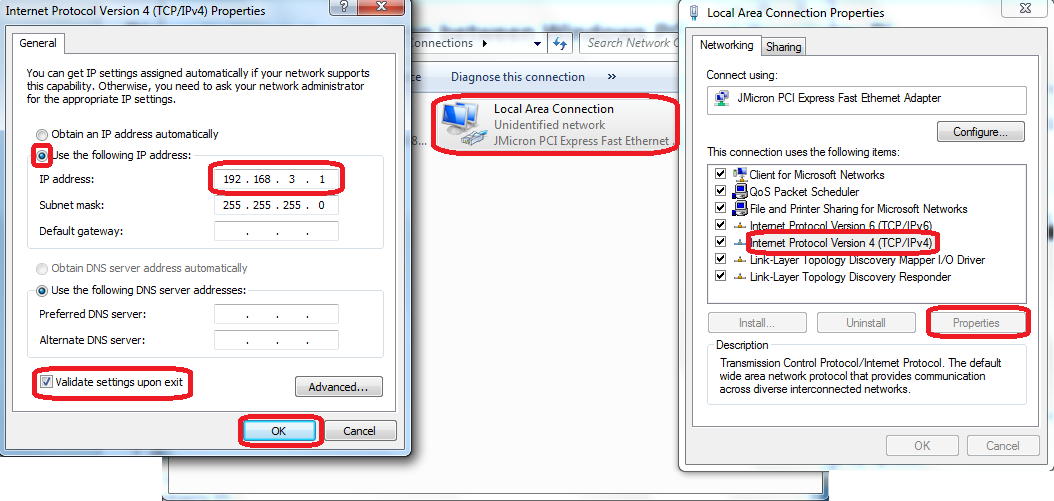
- Right click on Local Area Connection and click Properties.
- Select Internet Protocol Version 4 (TCP/IPv4) and click Properties.
- Select Use the following IP address option and provide an IP address (eg. 192.168.3.1).
- Check Validate settings upon exit (to validate settings).
- Click OK.
Step B:
- Download DHCP server for Windows from this link
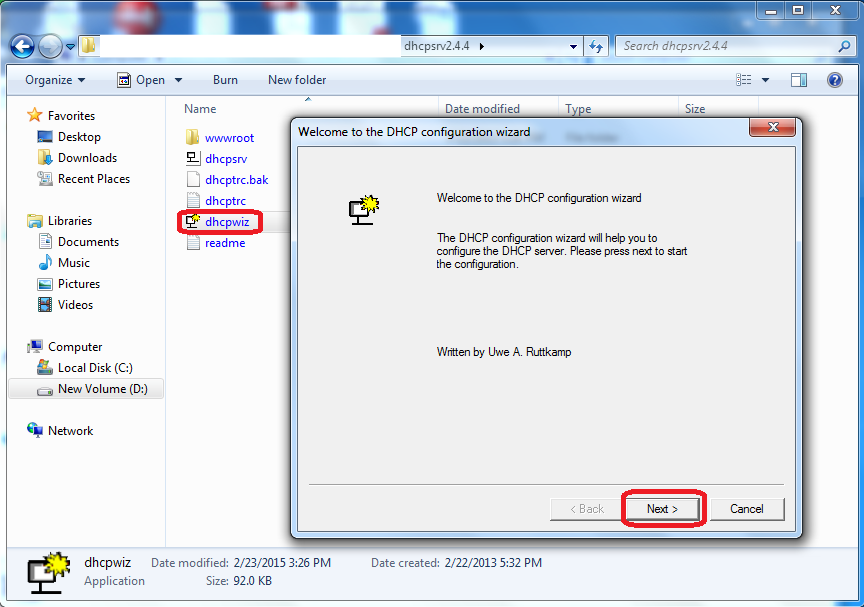
- Unzip the contents of Latest DHCP server for Windows ZIP file to C:\DHCP
- Run “dhcpwiz.exe” file and click Next
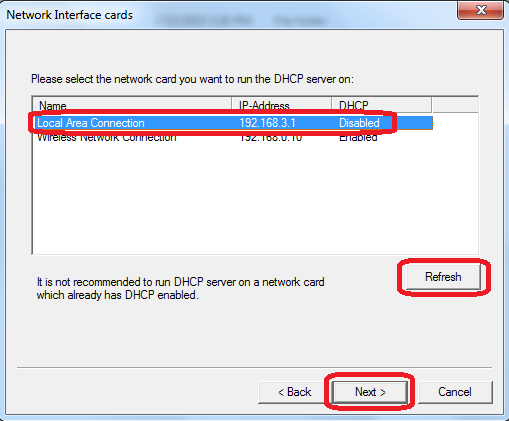
- Click on Refresh, choose Local Area Network or Ethernet (depends on Windows you are using) and hit Next
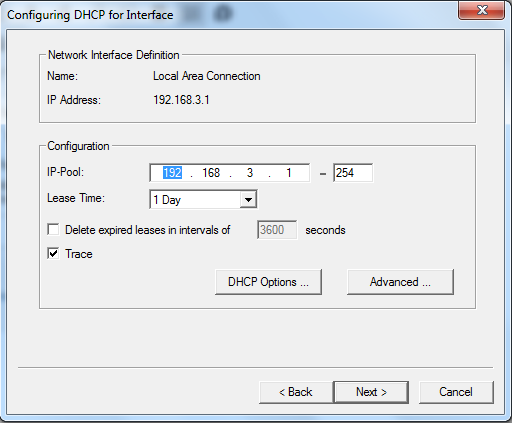
- Leave all values as default and Click on Next
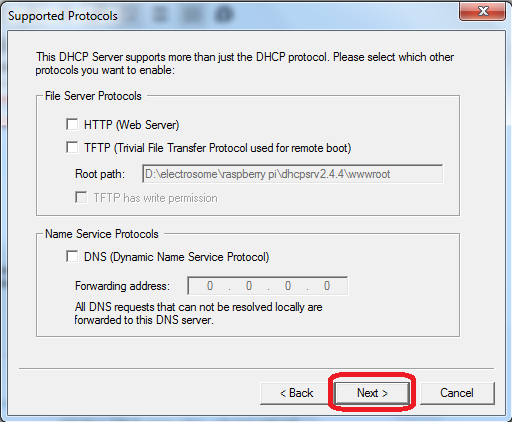
- Click Next (Don’t change any thing)
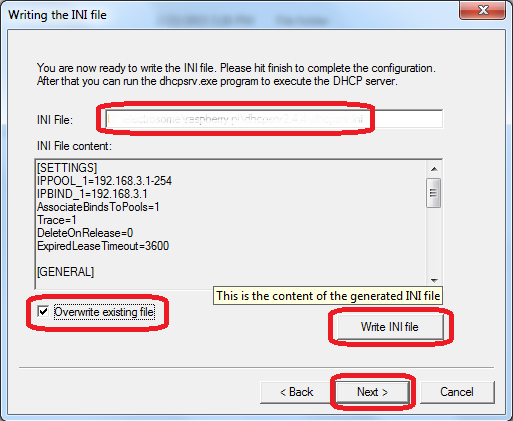
- Check whether the path of “INI file” is same as the location of the dhcpsrv.exe
- Check “Overwrite existing file”
- Click on Write “INI file”
- Click Next
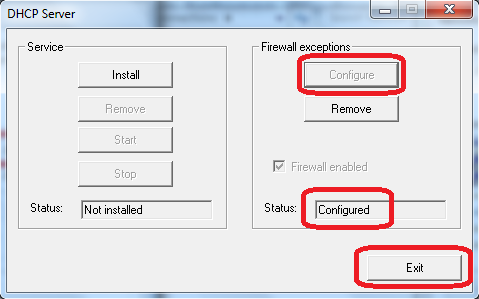
- Configure firewall by clicking Admin (Click yes on security warning)
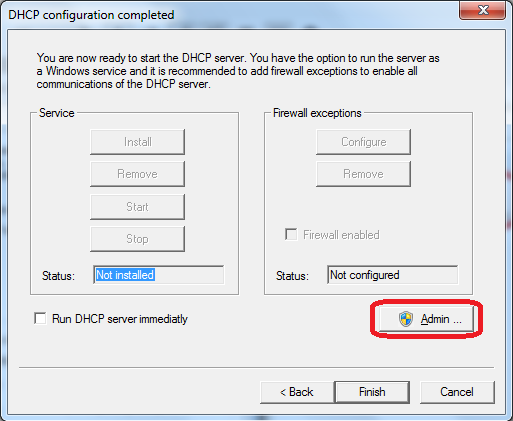
- Under “Firewall Exceptions” Click on Configure and then Exit
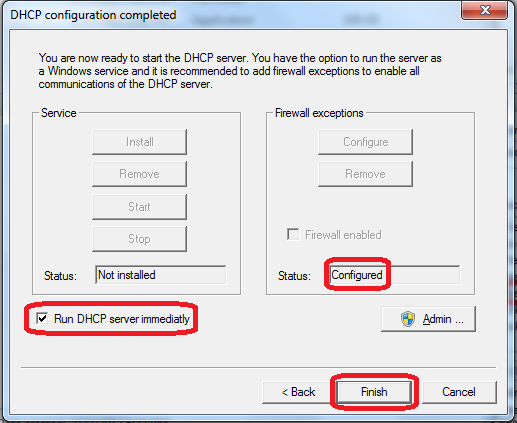
- Select the check box Run DHCP server immediately and click Finish
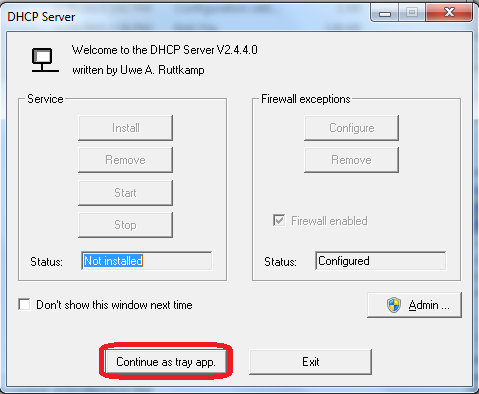
- Now hit Continue as tray app button
Step C:
- Connect the Raspberry Pi to the computer’s LAN port using cable
- Wait a while and a popup will show assigned IP address and the MAC Address of Raspberry Pi
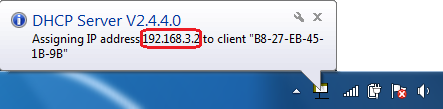
- Open PuTTY and access Raspberry Pi using IP Address shown in popup
- Enter pi as user name and raspberry as password
- That’s all 😎
Assigning Static IP address to Raspberry Pi
- Open “dhcpcd.conf” file in Nano editor
sudo nano /etc/dhcpcd.conf
- Scroll all the way to the bottom of the file and add one, or both of the following snippets. Depending on whether you want to set a static IP address for a wired connection (eth0) or a wireless connection (wlan0)
interface eth0
static ip_address=192.168.0.10/24
static routers=192.168.0.1
static domain_name_servers=192.168.0.1

interface wlan0
static ip_address=192.168.0.200/24
static routers=192.168.0.1
static domain_name_servers=192.168.0.1
- Save the configuration file by pressing “Ctrl” and “X” key followed by “Y” and “Return” key
Connecting to WiFi Access Point using Terminal
- Open “wpa_supplicant.conf” file in Nano editor
sudo nano /etc/wpa_supplicant/wpa_supplicant.conf
- Copy the following lines in bottom (Right click paste copied contents in PuTTY)
network={
ssid="Your_WiFi_name"
psk="Your_WiFi_password"
}
- Save the configuration file by pressing “Ctrl” and “X” key followed by “Y” and “Return” key
- Reboot Raspberry Pi using reboot command
sudo reboot
[…] SSH access, We need to know the IP address of RPi. Consult your router documentation or use this guide and login to RPi using Putty, A free SSH Client for Windows, with pi as user name and raspberry […]
[…] Blog – Access Raspberry Pi for the First Time via SSH without Keyboard, Mouse and LCD Display […]