
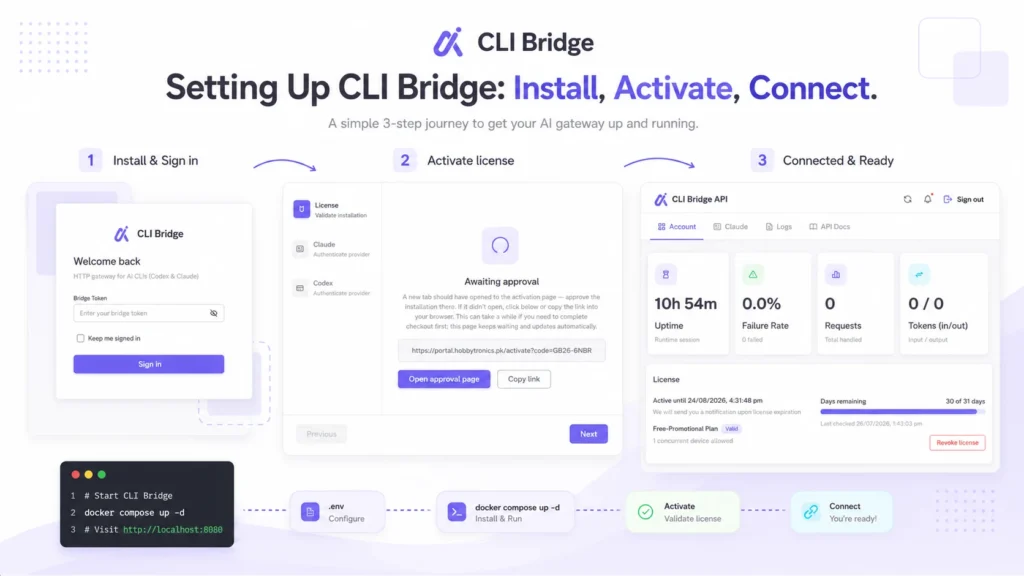
Setting Up CLI Bridge: Install, Activate, Connect
In Part 1, we talked about what CLI Bridge is and why you’d want it. Now let’s actually get it running. Grab a coffee — this whole thing takes about fifteen minutes, and most of that is just waiting for Docker to pull an image.
You’ll need three things before we start: Docker installed on your machine, an active ChatGPT Plus or Claude Pro subscription, and a CLI Bridge license for free.
Step 1: Create your .env file
CLI Bridge reads its settings from a .env file. Start by downloading the example one:
curl -O https://raw.githubusercontent.com/buildtheguild/cli-bridge/main/.env.example
cp .env.example .env
Open it up and set two things. First, a token that will act as the password for your API — anything calling CLIBridge will need to send this:
BRIDGE_TOKEN=your-long-random-secret-here
Don’t just type something memorable here — generate a proper random one:
node -e "console.log(require('crypto').randomBytes(32).toString('hex'))"
Paste whatever that spits out as your BRIDGE_TOKEN.
Second, decide which AI backend you’re using:
BACKEND=claude # or: codex
If you genuinely want both available and to switch between them without rebuilding anything, that’s fine too — the full image ships with both CLIs installed, and BACKEND just decides which one is currently active.
Step 2: Set up docker-compose.yml
Create a docker-compose.yml file next to your .env:
https://raw.githubusercontent.com/buildtheguild/cli-bridge/main/docker-compose.yml
That cli_data volume matters more than it looks — it’s where your login session and license state live. As long as you don’t wipe that volume, restarting the container won’t make you log in again.
Step 3: Start it up
docker compose pull
docker compose up -d
Give it a few seconds, then check it’s alive:
docker compose ps
You should see the container running and healthy.
Step 4: Activate your license
Open http://localhost:3900 in your browser. You’ll land on an activation screen. Click Activate, and it’ll send you to the licensing portal to log in and approve the session. Once you approve it, come back to the tab — it picks up the activation automatically, no code to copy or paste anywhere.
If you’re curious whether it went through, hit the status endpoint:
curl http://localhost:3900/v1/license/status
You’re looking for "status": "valid".
One nice detail here: if the licensing server is briefly unreachable later on — a network blip, a deploy on their end — CLI Bridge has a 72-hour grace period built in, so a short outage somewhere else doesn’t suddenly lock you out of your own setup.
Step 5: Connect your Claude or Codex account (one time only)
This is the part that actually connects CLIBridge to your Plus or Pro account. You’ve got two ways to do it — the dashboard is the easier one, and the CLI route is there if you’d rather stay in a terminal or you’re scripting a headless setup.
Option A: the dashboard (recommended)
Open http://localhost:3900 — it’s the same activation screen from Step 4, now showing a setup step for whichever provider(s) your image has installed. Go to the Claude or Codex step and click Authenticate. A browser tab opens for you to approve the login; once you approve it, come back to the dashboard tab and it detects the connection automatically — no terminal, no copying codes around.
If you’re running the combined image with both CLIs installed, you’ll see a step for each one, and you can authenticate both independently of which BACKEND is currently active.
Option B: the CLI (headless or scripted setups)
If you’re on the Claude backend:
docker compose exec cli-bridge sh
claude auth login
It’ll print a URL. Open it in any browser, approve the login, and you’re done. Type exit to leave the container shell.
If you’re on Codex instead:
docker compose exec cli-bridge sh
codex login --device-auth
Same idea — open the printed URL, approve it, exit when it’s confirmed.
Either way, that login gets stored in the cli_data volume from Step 2, so you won’t need to repeat this unless you wipe that volume on purpose.
Step 6: Confirm everything’s actually working
Last check — make sure the whole pipeline is alive end to end:
curl -H "Authorization: Bearer YOUR_BRIDGE_TOKEN" http://localhost:3900/v1/health
A healthy response back means you’re fully set up: license active, CLI authenticated, ready for real requests.
What you’ve got right now
At this point you have a running CLI Bridge instance, licensed, with your Claude or Codex account connected, sitting on localhost:3900 and ready to answer API calls. It’s not doing anything useful yet, because we haven’t actually called it — that’s exactly what Part 3 is for. We’ll fire off a real chat completion, turn on streaming, send an image, and try out the built-in audio transcription endpoint.
