
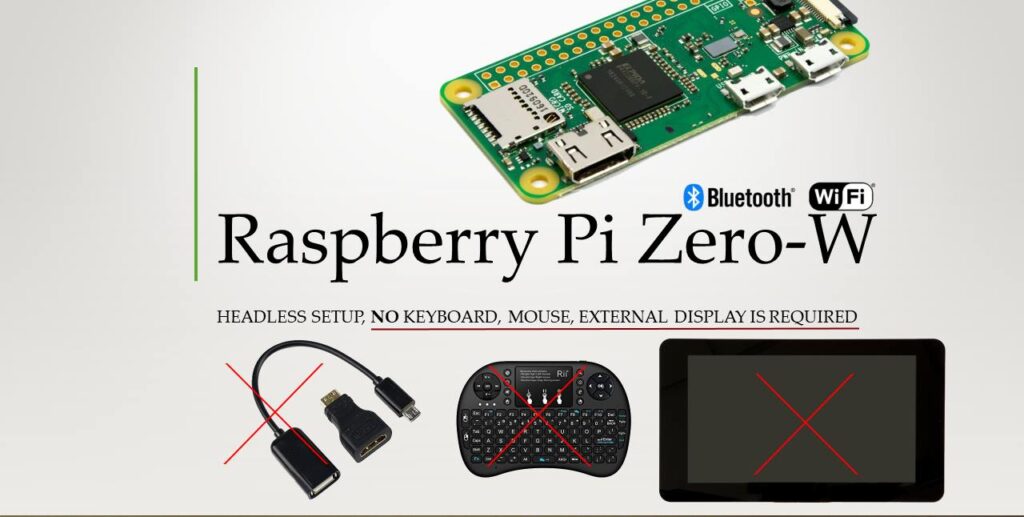
No Keyboard, Mouse, Display, HDMI or USB Converter is required for Raspberry Pi OS (Formally the Raspbian) Headless Setup!!
Raspberry Pi OS Headless Setup works on Raspberry Pi 3, Raspberry Pi 4, Raspberry Pi Pi Zero and Raspberry Pi Zero W
Contents:
- Hardware Required
- Software Required
- Step By Step Procedure
- Accessing Raspberry Pi via SSH using PuTTY
- Important Note
Years back, We had published a guide for setting up Raspbian Jessie on Raspberry Pi without Keyboard, Mouse and External Display. Today We are back with an another guide for Raspberry Pi 3, Raspberry Pi Zero W and yes there is no need of any accessories like described earlier, which add up cost to our low budget Raspberry Pi setup. There are lot of guides available over the internet with label of “Headless” but most of them do not contain complete information required for successful headless setup. So let’s get started!!
Hardware Required:
- Raspberry Pi 3 / Raspberry Pi 4 / Raspberry Pi Zero W (Builtin WiFi & Bluetooth)
- MicroSD Card (Class 10)
- Power Supply (Official / Generic)
- MicroSD Card Reader
- Personal Computer / Laptop
Software Required:
Step By Step Procedure:
Step A – Downloading the required Software :
- Download and install SD Formatter from SD Association website.
- Download and install Etcher from balena.io.
- Download and install 7zip from 7-zip.org.
- Download and install Notepad++ (Windows Notepad will also work).
- Download latest version of Raspbian which is Stretch (Raspbian Stretch with Desktop / Raspbian Stretch Lite) from official Raspberry foundation website (Do not use Noobs Operating System).
- Extract Raspbian Stretch image using 7zip.
Step B – Installing Raspbian OS on MircoSD Card:
- Insert the MicroSD card into card reader and mount it on to USB port.
- If you have old version of Raspian Jessie on to the card, just format the card using SD Formatter.
- Run Etcher and select image extracted already from downloaded zip file.
- Select SD Card drive.
- Hit Flash button and wait few minutes.
- On windows 10 various pop ups many emerge, just ignore them and wait until it will say Flash Complete!
- SD Card may be unmounted automatically after flash process completes, unplug the SD card reader and plug it back.
- Ignore all errors messages pop up after inserting the SD Card Reader back and go for step C.
Step C – Preparing SD Card for first boot (Headless):
-
- Reinsertion of SD Card will create two more drives in My Computer section.
-
- Ignore any errors or pop ups emerge (Do not format the drive this time as asked by Windows).
-
- Open up the Drive with “boot” volume lable.
-
- Create a new blank notepad file and save it in the boot drive as “ssh” without any extension in the end (See video for better understanding).
-
- Creating “ssh” file will enable ssh access and We’ll be able to configure our Raspberry Pi Zero Remotely.
- Create a new file in the same drive with name of “wpa_supplicant.conf” without any extension in the end and paste the following contents in there (Change SSID and Password according to your own network).
ctrl_interface=DIR=/var/run/wpa_supplicant GROUP=netdev
update_config=1
country=GB

network={
	ssid="WiFi_SSID"
	psk="WiFi_Password"
}
-
- wpa_supplicant.conf file will be copied to /etc/wpa_supplicant/ directory on boot and our Pi will be connected to WiFi network automatically.
- Change country as required
- Without providing the country information, Raspberry Pi may not get connected to your WiFi network
- Save the “wpa_supplicant.conf” file and remove Micro SD Card Reader.
Step D – Booting the Raspberry Pi:
- Insert the card into Raspberry Pi and you are ready to go.
- Watch our video tutorial for better understanding.
- As your Raspberry Pi is directly connected to your WiFi Router, consult your Router’s manual to find out the IP address assigned to your Raspberry Pi.
- For example, you can find out the IP address in TP-LINK router under DHCP > DHCP Client List.
Important Note:
Hence, ssh is now enabled, it is recommended to change the default password. Adopt the few extra steps as following;
-
- Open up a new ssh session using PuTTY
- Type passwd and press Enter key
- Enter raspberry which is assigned as default password to user pi
- Enter new password of your choice and press Enter key
- Confirm your new password by typing it once again and press Enter key
- A new message passwd: password updated successfully will confirm that you have successfully changed your default password for user pi.
Hello,
how do you find the IP to connect to the raspberry?
I followed your guide and then I searched using advanced IP Scan and also using the methode of your other video https://hobbytronics.pk/accessing-raspberry-pi-on-first-boot-without-keyboard-mouse-and-display-directly-from-pc-using-ssh/ but I can’t find the IP of the Raspberry PI.
Are you sure that this methode work for the lastest version? I’m using the rasbian image of June 2018.
As discussed in our Guide https://hobbytronics.pk/accessing-raspberry-pi-on-first-boot-without-keyboard-mouse-and-display-directly-from-pc-using-ssh/, Process to find the IP address is different as a DHCP service installed on your PC was issuing the IP address to your Raspberry Pi. In our recent guide Raspbian Stretch Headless Setup on Raspberry Pi, Your Raspberry Pi is directly connected to your WiFi network and your WiFi router is assigning IP address to your Raspberry Pi, so you have to find the IP address under your Router Settings. For example, We are using GargoyleRouter Management Utility, A custom firmware installed in our router. We can find the connected devices with their all… Read more »
Many modern operating systems use a system to connect to device by local name. When you first ssh in use [email protected] as hostname in putty and this could save a lot of hassle
Hello,
After installation it’s working fine using putty or vnc, but once I restarted it becomes unavailable.
Can you please help me accordingly?
Hello. Did you assign static IP address to your Pi? I suspect, IP Address got changed after restart.
You have to enable ssh-server in raspi-config settings. Adding ssh file to the boot dir makes it awailable only on firs boot as far as I know.
sudo raspi-config
5) Interfacing options -> 2) SSH -> turn on
And one more thing to do on headless setup is to expand root filesystem from raspi-config.
No. Adding ssh file permanently enables ssh.
Skjoldtech, Mosquitto works with log2ram.