

Contents:
- Home automation
- Central Control System
- Sensor Node
- Making all the stuff talk to each other
- Node Red User Interface
Home automation is the residential extension of building automation and involves the control and automation of lighting, heating, ventilation, air conditioning (HVAC), appliances, and security. Modern systems generally consist of switches and sensors connected to a central hub sometimes called a “gateway” from which the system is controlled with a user interface that is interacted either with a wall-mounted terminal, mobile phone software, tablet computer or a web interface (Wikipedia).
There are various commercial Home Automation systems are available which may cost handsome amount of money to spend for controlling only few appliances and control is limited to the options set by vendor. This guide is intended to establish such an efficient system with unlimited options according to users needs while keeping the budget as low as possible. Let’s dive in the world of Internet of Things 😎 .
As mentioned earlier, all the appliances are connected to central controlling unit which is Raspberry Pi 2, so let’s start from the beginning, The Brain.
1) Central Control System:
The Hardware:
- Raspberry Pi 3 | Raspberry Pi Zero W
- MicroSD Card (At least 8Gb)
- LAN cable (preferred) / Wireless USB Adapter
- Power supply (2A)
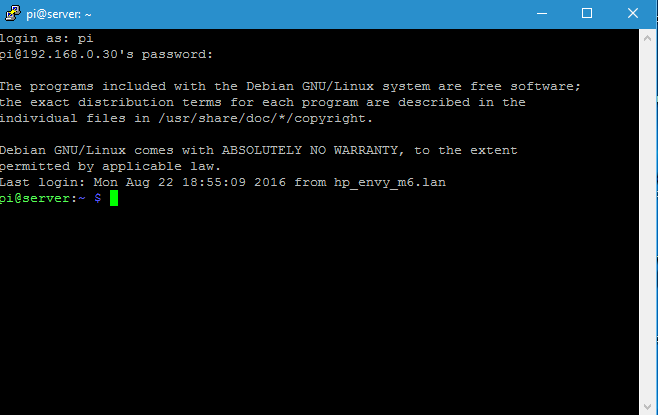
Prepare SD card according Raspbian Stretch Headless Setup on Raspberry Pi Zero, Zero W, Pi 3 and plug it in to Raspberry Pi (RPi). Login to RPi using Putty, A free SSH Client for Windows, with pi as user name and raspberry as password. In picture below, you can see pi@server, where server is the Hostname of RPi in my case, it will be Raspberry in your case. After login, let’s install our necessary software.
The Software:
First of all, update the system with these commands.
sudo apt-get update
sudo apt-get upgrade -y
Mosquitto:
Follow Installing secure Mosquitto broker on Raspberry Pi with Raspbian Jessie or Stretch along with systemd start up guide to install Mosquitto MQTT Broker (MQ Telemetry Transport).
Nginx:
Nginxweb server is required for OTA (Over the Air) updates of our sensor nodes.
sudo apt-get install nginx
cd /etc/nginx/sites-available
sudo cp default autohome
sudo ln -s /etc/nginx/sites-available/autohome /etc/ginx/sites-enabled/autohome
sudo rm /etc/nginx/sites-enabled/default
sudo /etc/init.d/nginx reload
Now Nginx is installed and our web server location is root /var/www/html .
Samba:
Install samba by following our post Password Protected Raspberry Pi File Server – Samba. It will help us in uploading binary files to servers for OTA implementation.
Node-Red:
Raspbian comes with Node-Red and Node.js pre-installed with an outdated version. Update the software by following our guide Raspberry Pi: Node-Red Installation.
Node-Red Nodes:
Now We have completed almost all the software part but there are few additional tools still need to be loaded over Node-RED. Node-RED nodes comes with the name of “node-red-contrib-node”, where “node” is name used for certain node. For installing additional nodes, We have to point towards the node-red installation directory, where our additional nodes will be installed and will be available in Node-RED.
cd ~/.node-red
Pointing towards right directory is crucial for availability of newly installed node with in Node-RED. Let’s install few useful nodes for Node-RED.
npm i node-red-contrib-bigtimer
npm install node-red-dashboard
After installation of additional Node-RED nodes, always restart Node-RED with following command.
sudo systemctl stop nodered.service
sudo systemctl start nodered.service
“node-red-contrib-bigtimer” will be used for automation purposes while “node-red-dashboard” will provide us web-based user interface to control our sensor nodes.
2) Sensor Node:
The Hardware:
The Software:
- Arduino IDE with Arduino core for ESP8266
- Drivers for PL2303HX UART cable | CP2102 adapter | NodeMCU | WeMos
- ESP8266WiFi Library
- ESP8266httpUpdate Library
- ESP8266HTTPClient Library
- PubSubClient MQTT Library
- ArduinoJson Library
- FS Library
- ESPMetRED
Install Arduino core for ESP8266 according to ESP8266 Basic Setup and Program using Arduino IDE guide. ESP8266WiFi, ESP8266httpUpdate, ESP8266HTTPClient and FS Libraries come with Arduino core for ESP8266. Download PubSubClient MQTT and ArduinoJson Libraries from Githab (by clicking on certain library name) and install according to the instructions given here.
Now it comes the programming part. Open your favourite Arduino IDE, Select your relevant board i.e. Generic ESP8266 Module | ModeMCU 1.0 | WeMos D1, R1 & mini, from the Tools > Board. Also select appropriate port from Tools > Port. Now We are ready to write our code in Arduino IDE. Open up Examples > ESPMetRED > Examples > Relay sketch and burn it to your ESP8266 for demonstration purpose. For instructions of using ESPMetRED library visit our ESPMetRED an Arduino IDE compatible library to communicate ESP8266 and Node-Red via MQTT guide.
3) Making all the stuff talk to each other:
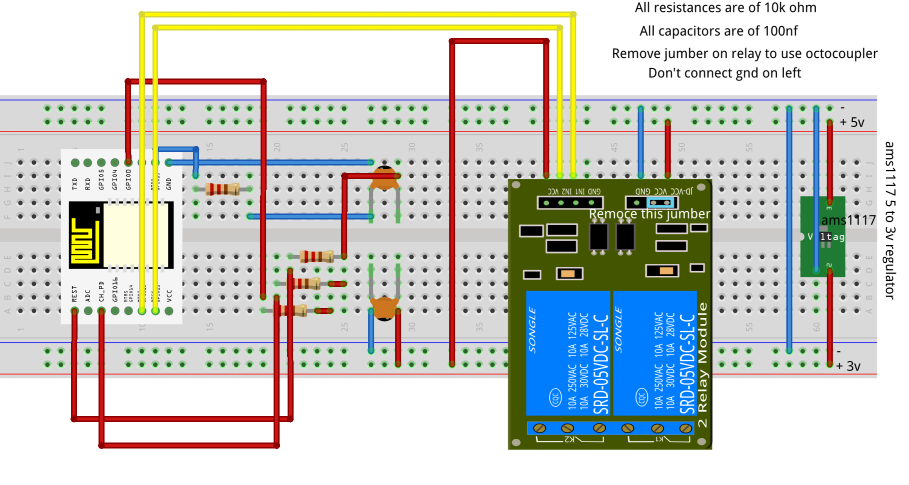
Here it comes the fun part, a real Internet of Things where our main server and sensor nodes talk to each other simultaneously according to the definition of MQTT. Connect for example a Dual Channel Relay to ESP8266 Unit according to the diagram below.
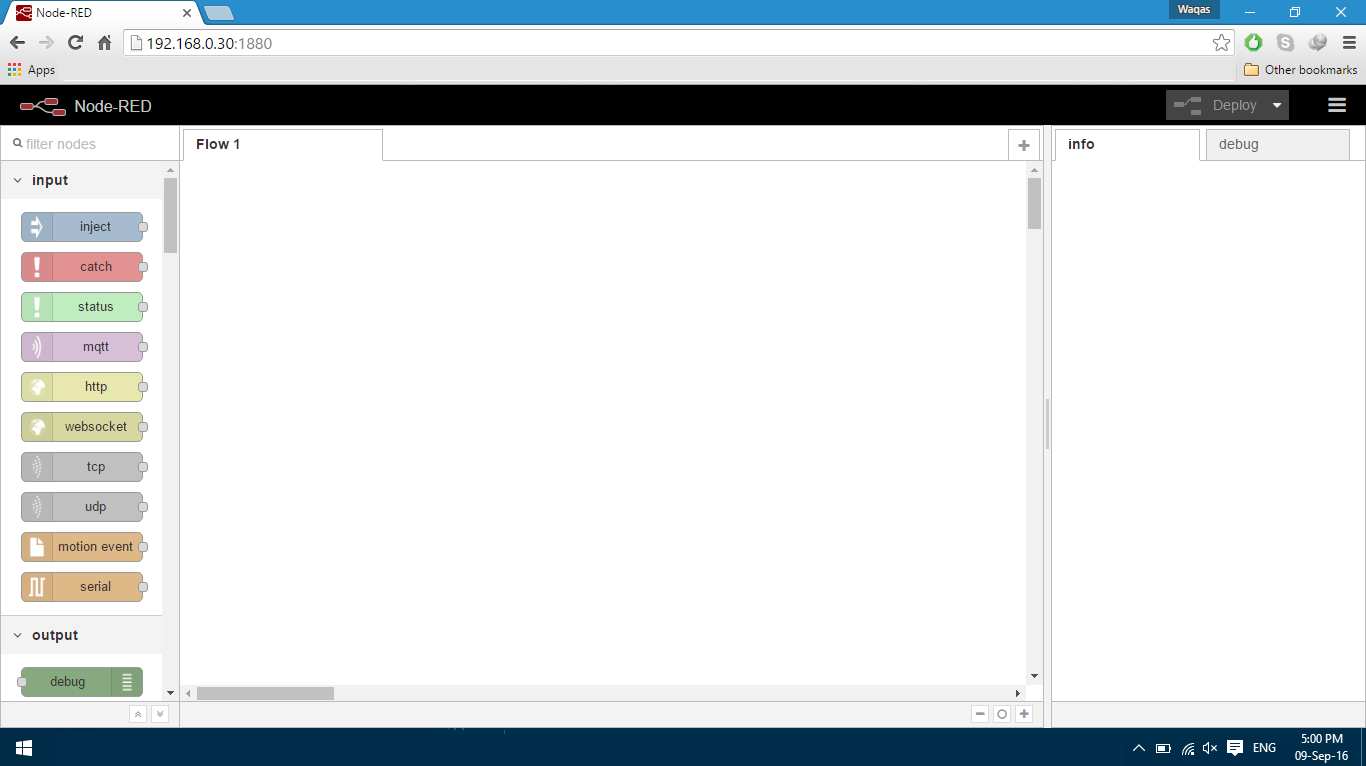
Power up the sensor node and open nodered URL in your computer browser. For example in this IP Address of our Pi is 192.168.0.30 so We’ll put 192.168.0.30:1880 in to our browser address bar and YAHOOO, Welcome to the world of Node-RED :-). Let’s wire the things in node-red.
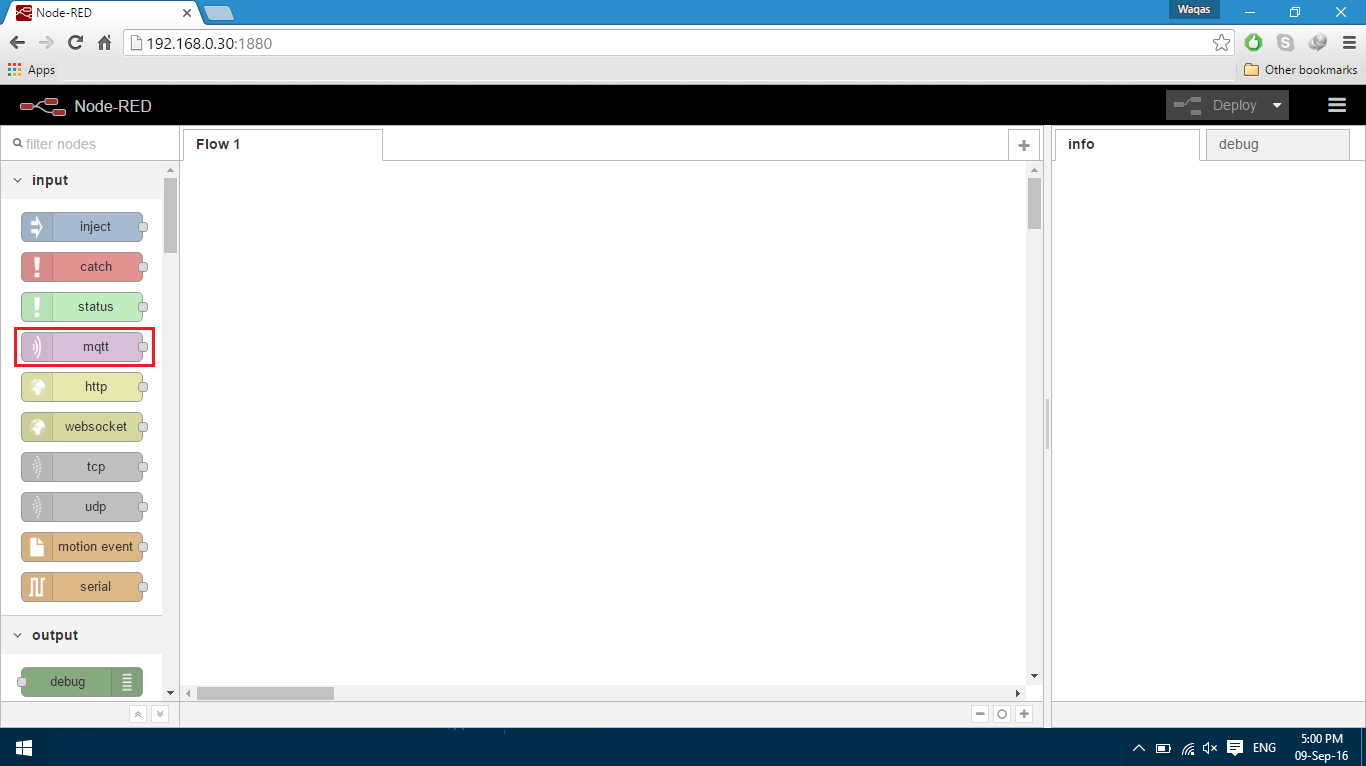
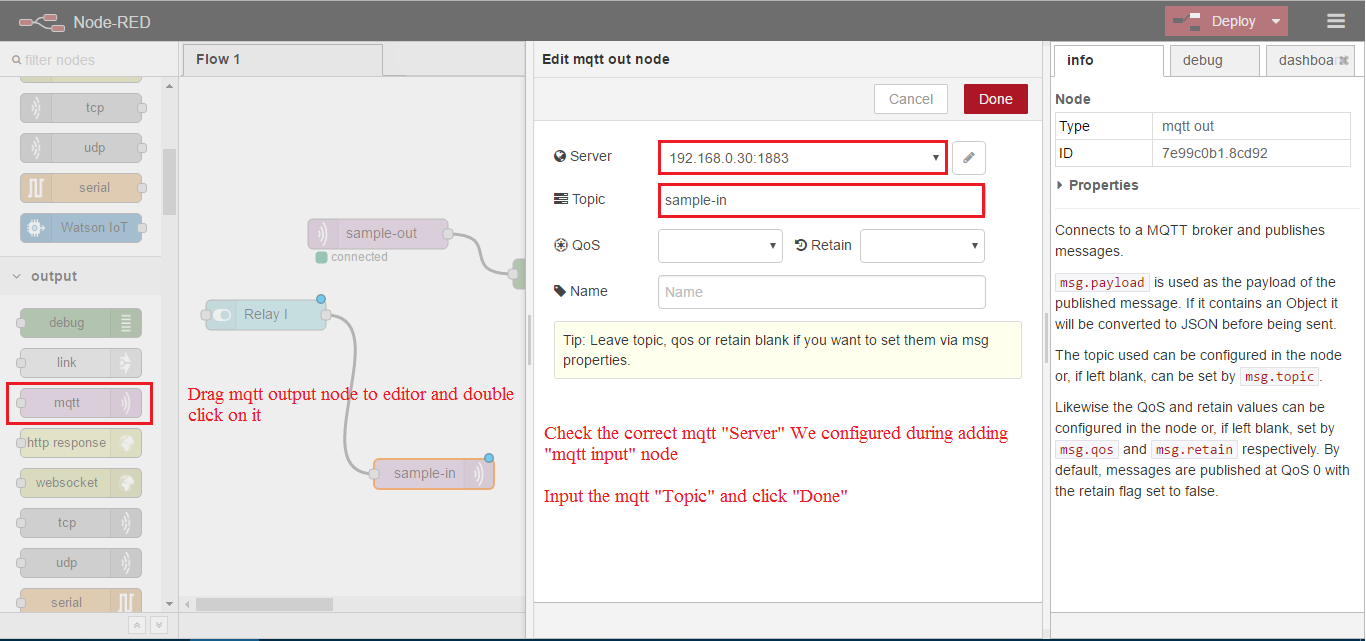
Adding MQTT Node to Node-Red:
1. Click on mqtt node on the left pan and drag it in to the Flow 1 Window.
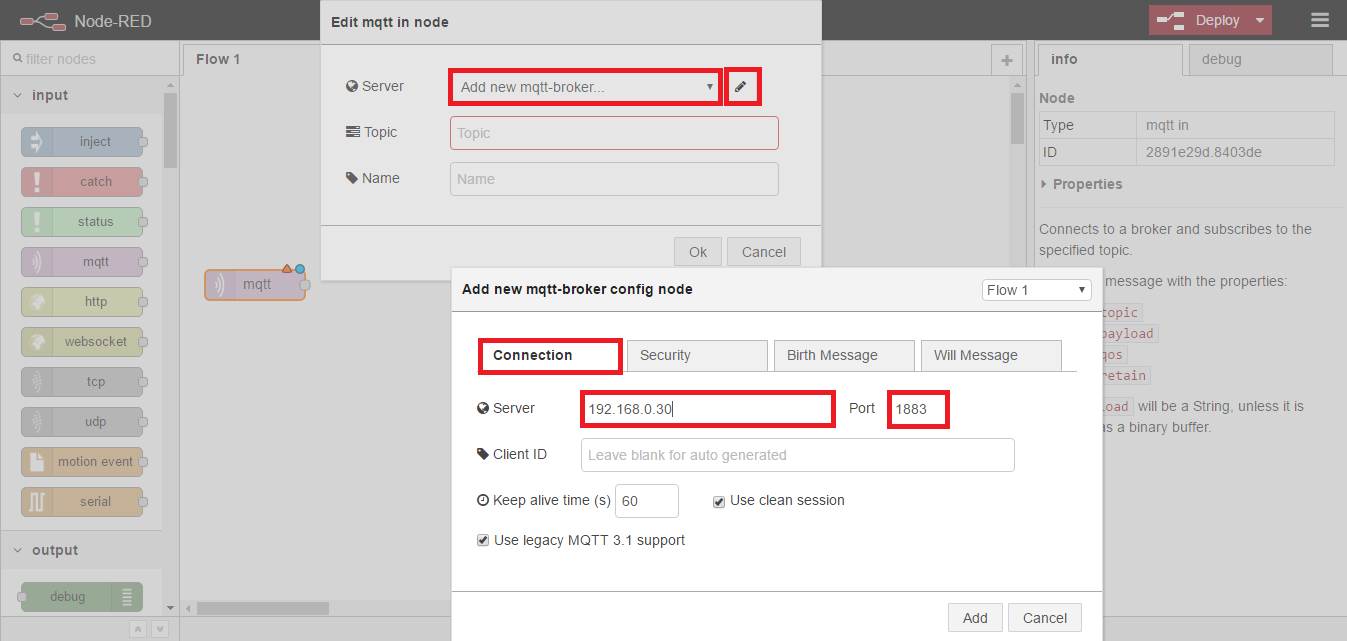
 2. Double click on mqtt node choose “Add new mqtt-broker” and click on “Pencil” icon.
3. In “Connection” tab, enter the “Server” address which is the address of pi i.e. 192.168.0.30 and “Port” 1883.
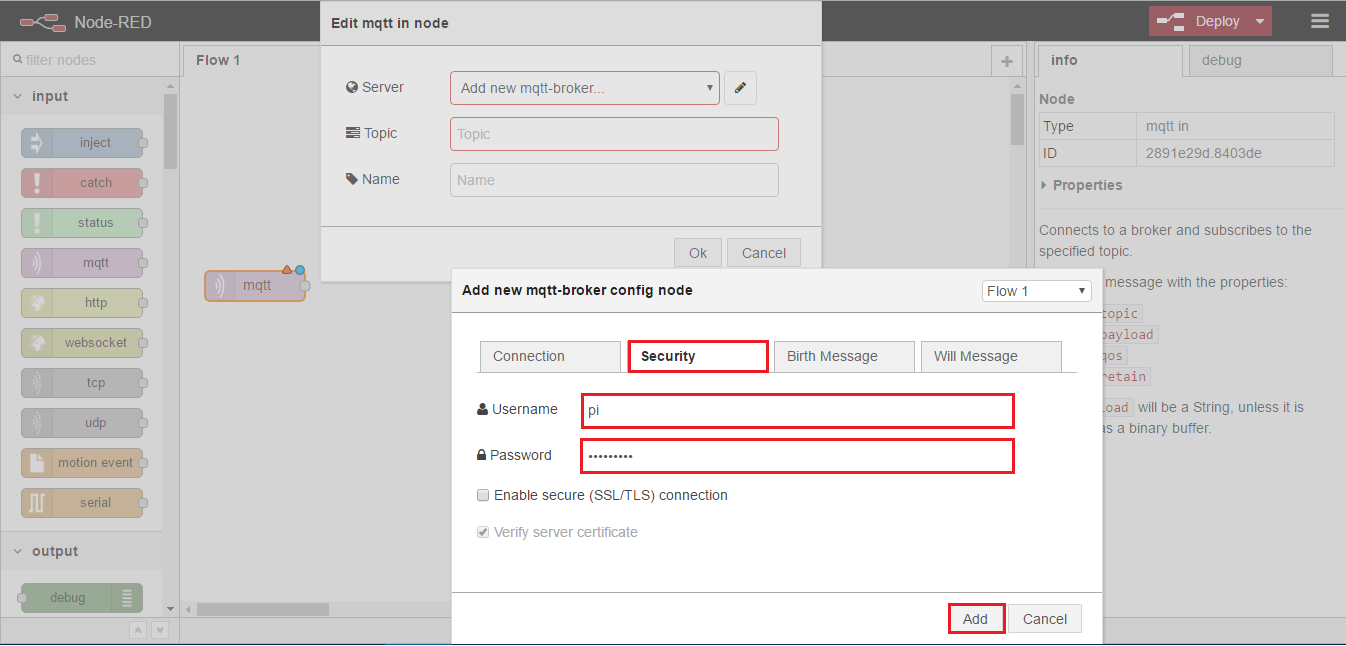
4. Click “Security” tab and input the user name and password you chose while following this tutorial and click on “Add” button.
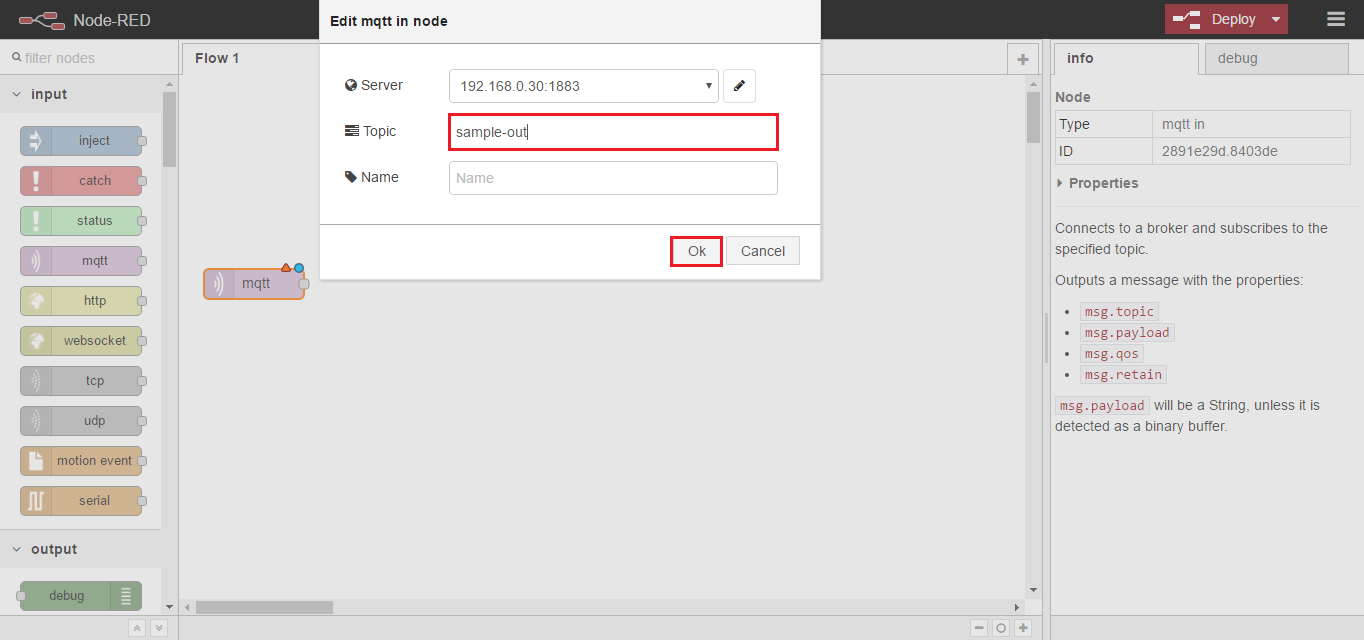
5. Input the “MQTT PUBLISH TOPIC” of our sensor node which is “sample-out” and hit “OK” button.
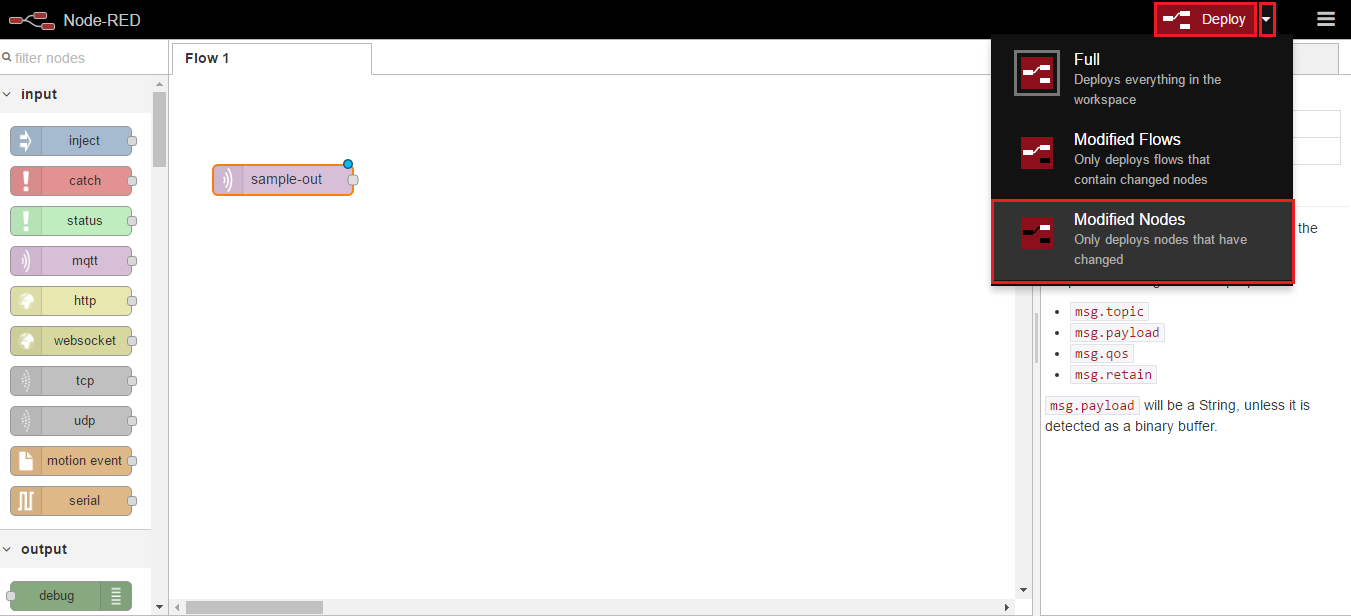
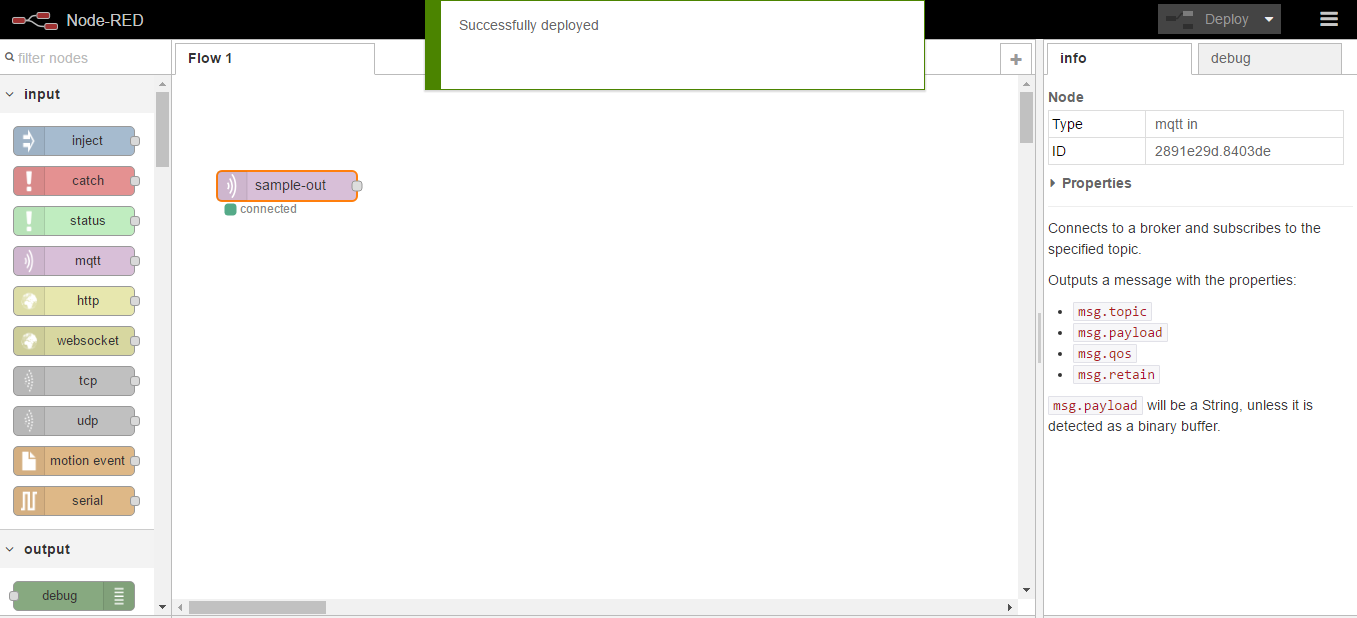
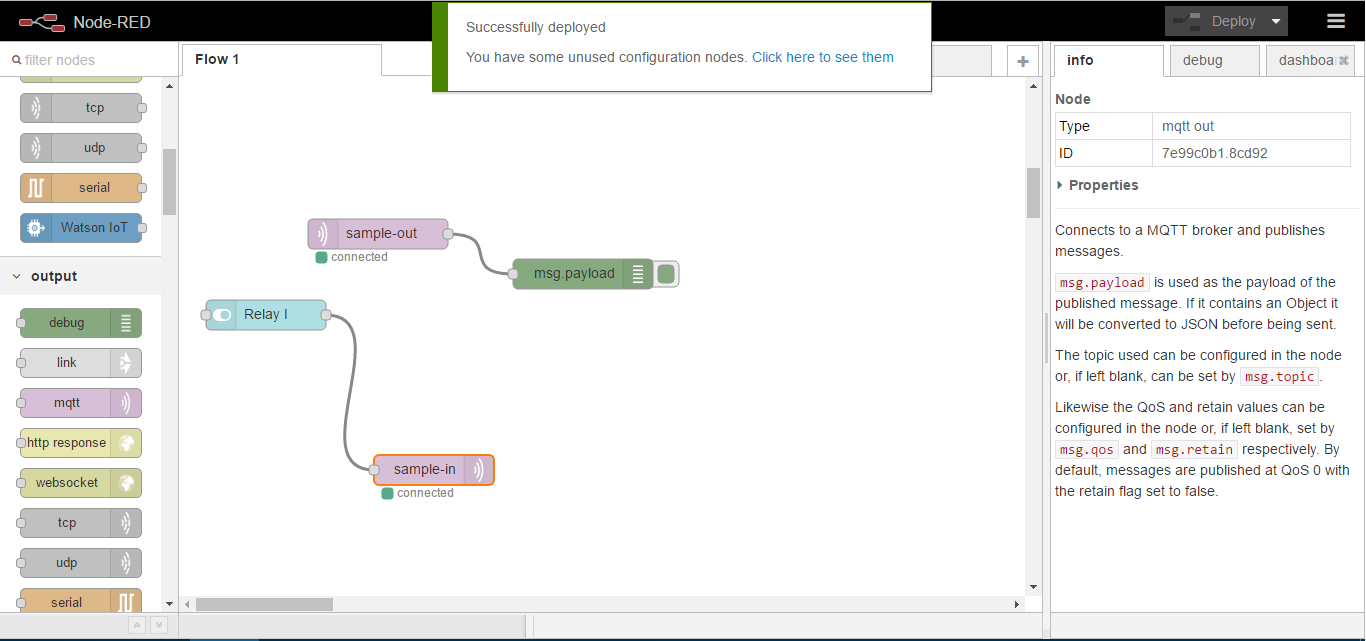
Deploy | Save the Changes We have made so far:
Every time We make any change to Node-Red such as adding a Node etc. We need to deploy that changes. For this purpose, click on “down arrow” right to the “Deploy” button and choose “Modified Nodes”. By choosing “Modified Nodes” every time when We’ll “Deploy” only that modified node will be affected. After that hit “Deploy” button and a message will pop up with success.
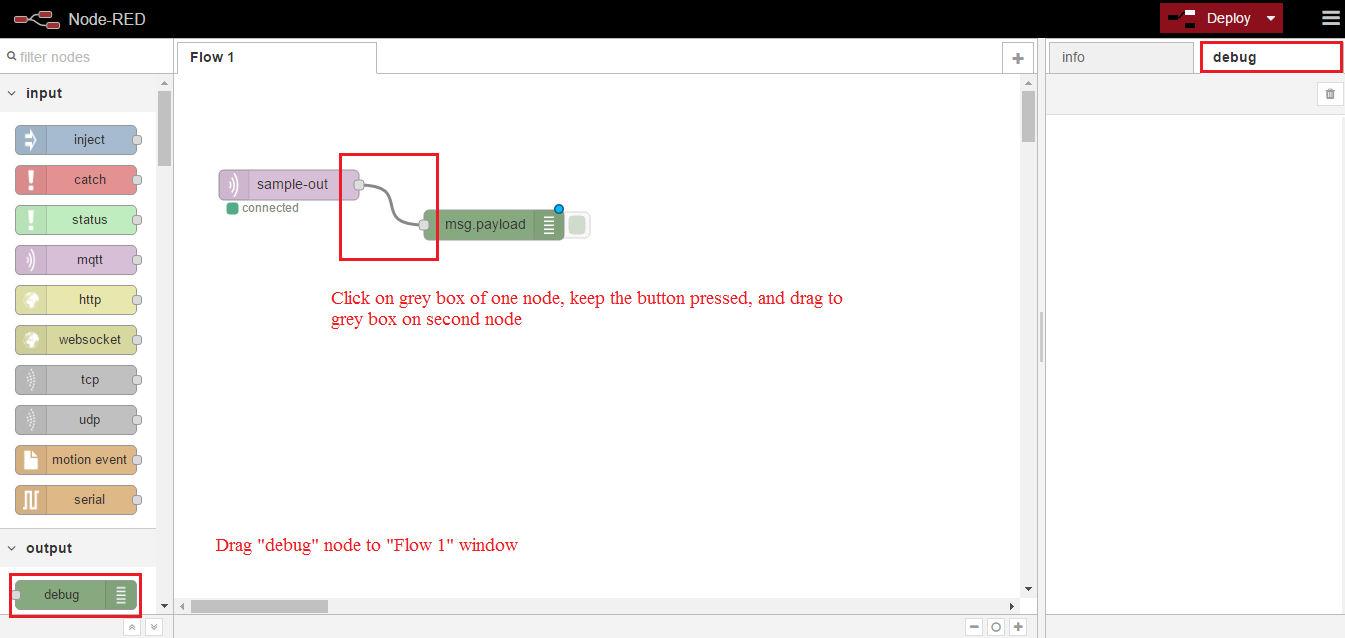
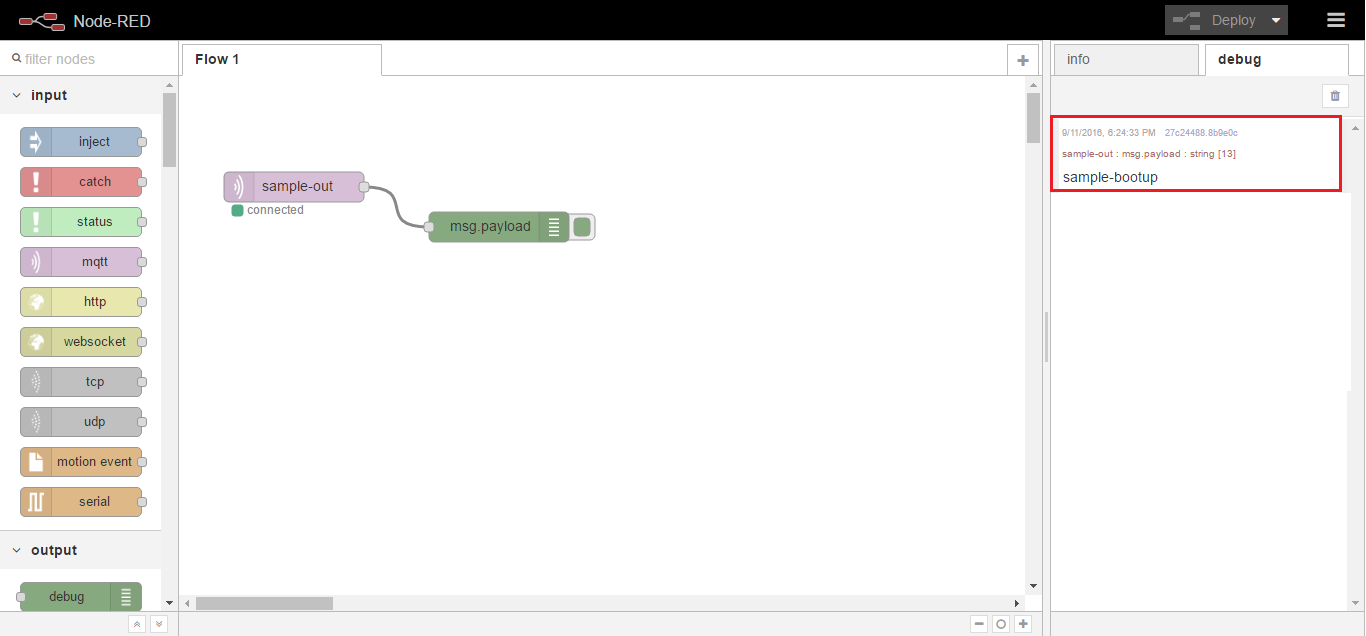
Now our “sample-out” mqtt node is connected to our mqtt server and can receive any message published on this topic. Let’s wire a debug node to mqtt node we already added to our Node-Red and see What happens (Don’t forget to “Deploy” the changes after adding or editing any node). Just reboot your ESP8266 unit and you can see information in debug column i.e. “sample-bootup”.
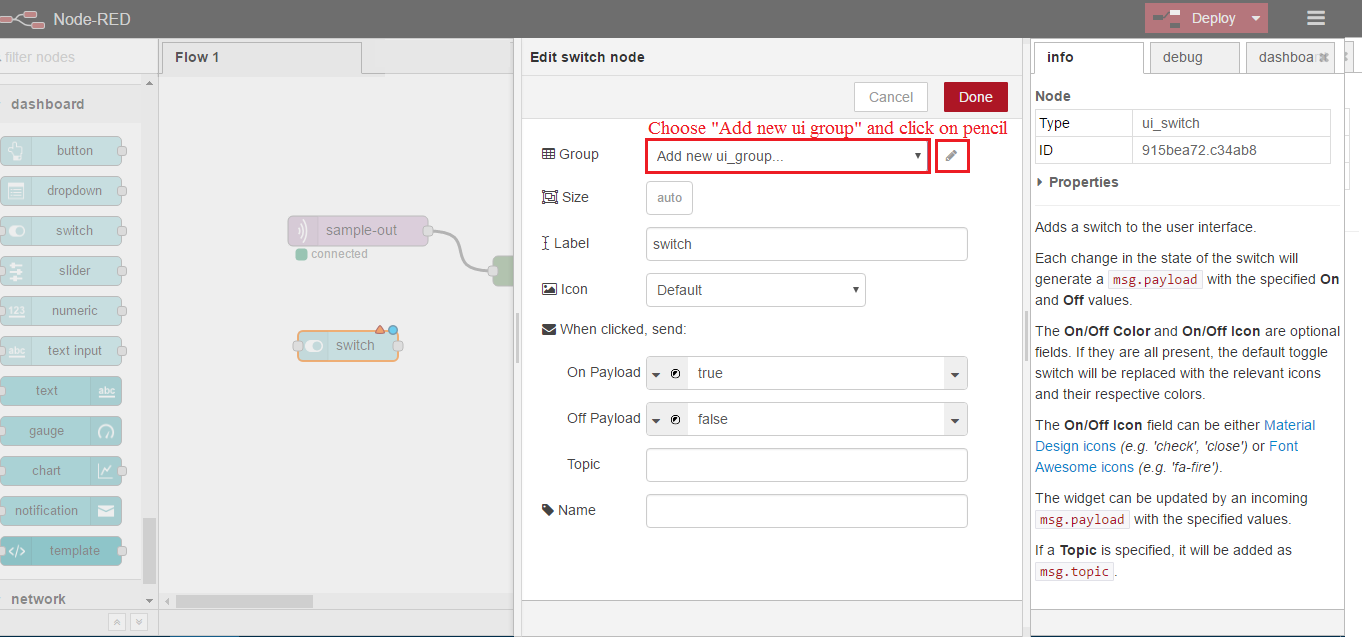
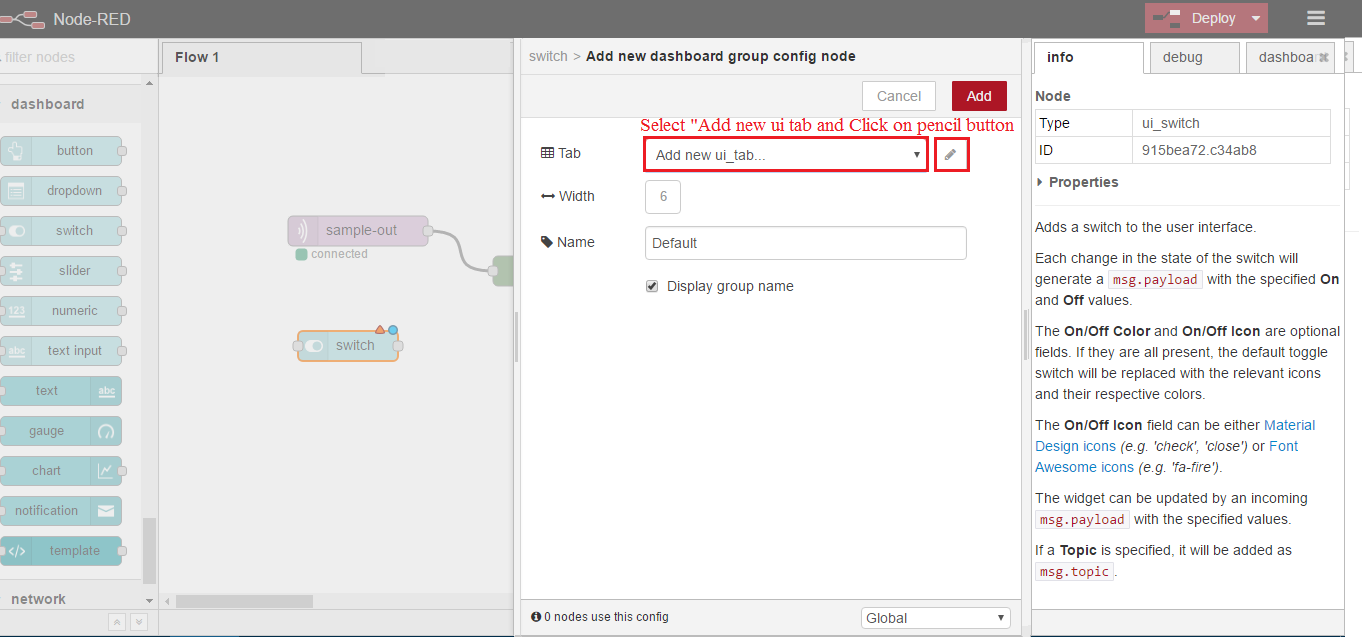
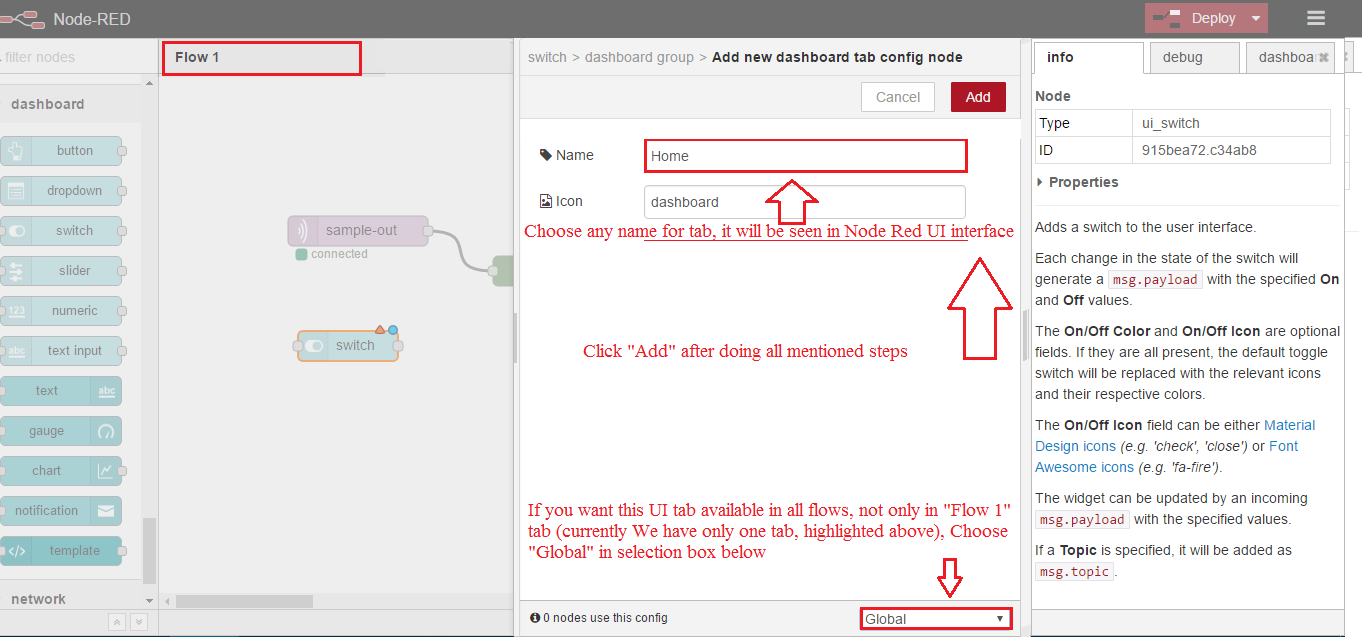
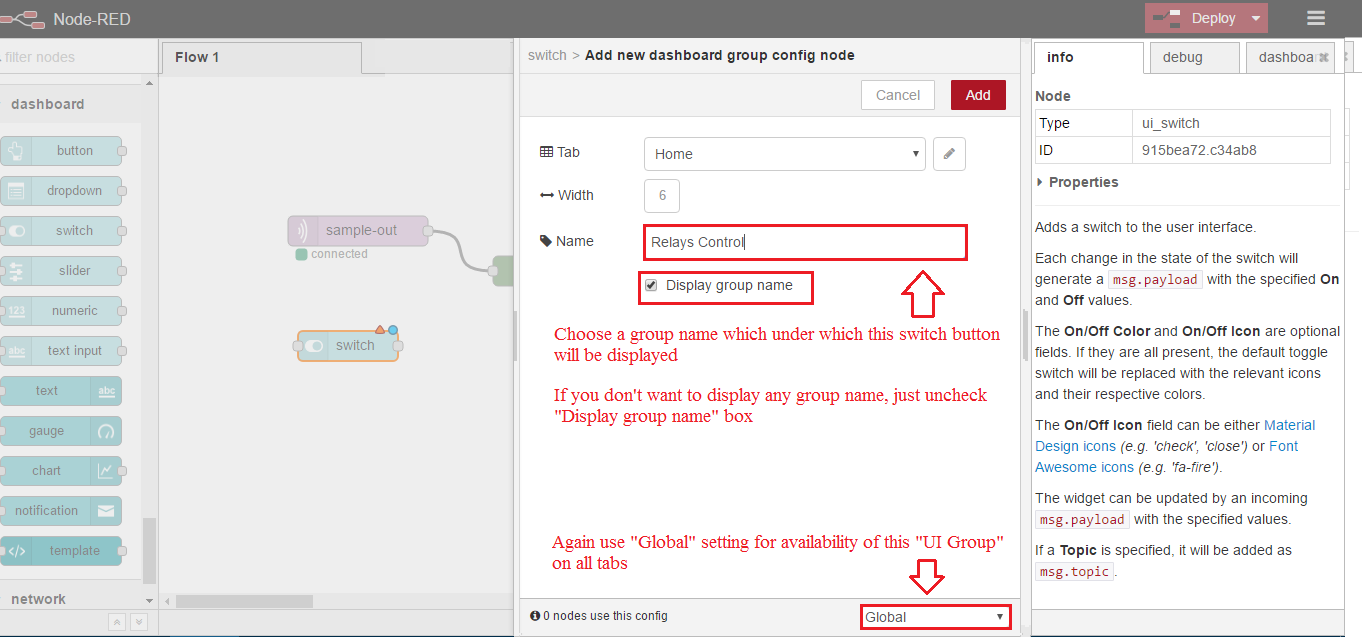
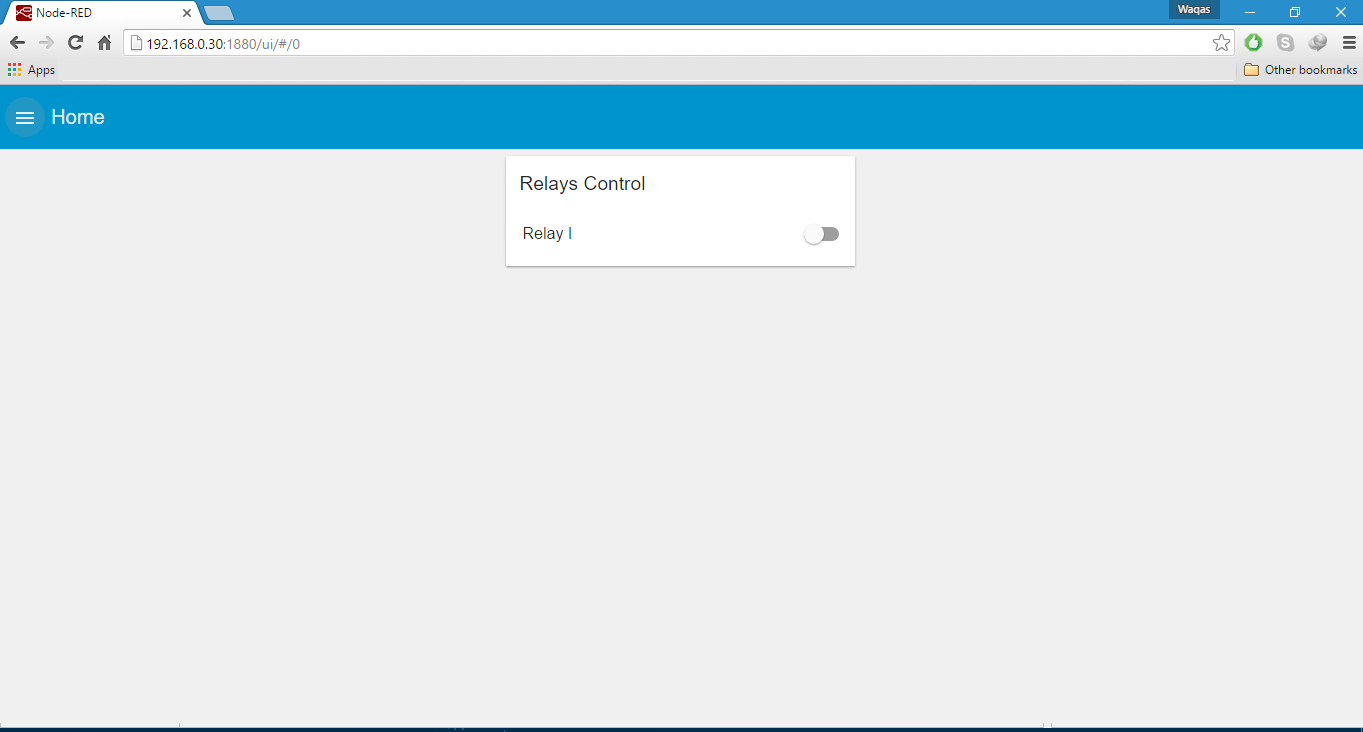
4) Node Red User Interface (UI):
Scroll down to “dashboard” in left panel and grab the “switch” icon to editor and follow the instruction given on the pictures below.

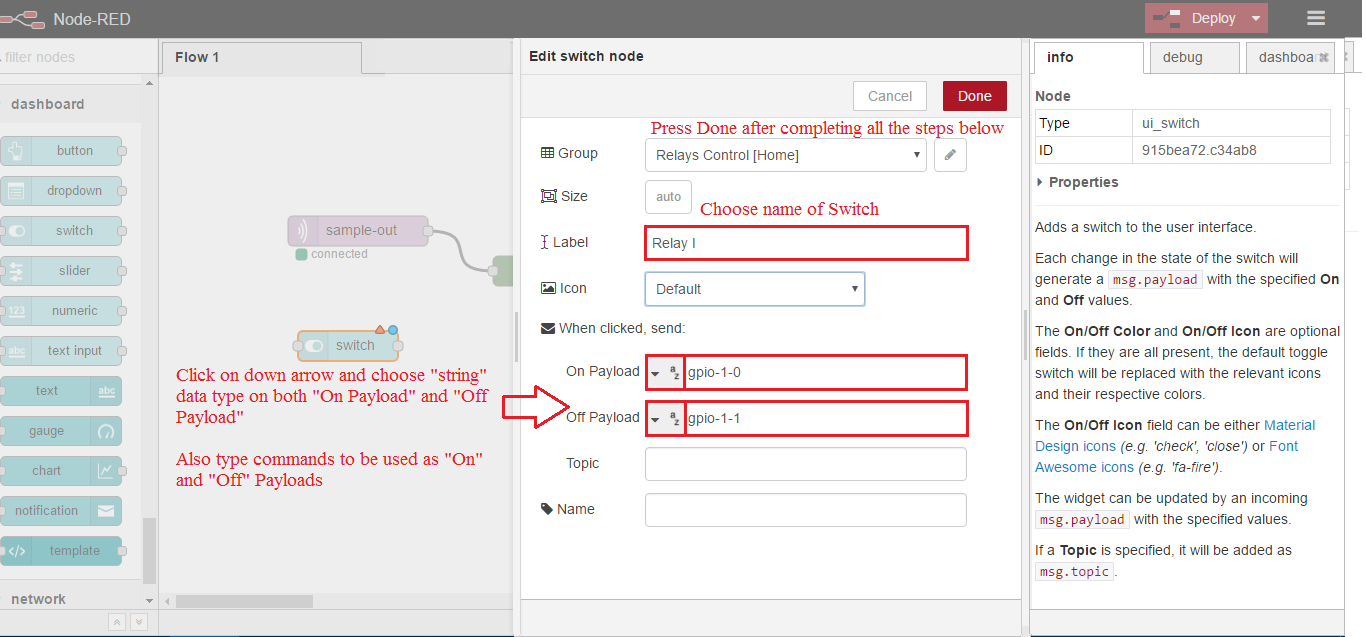
Now We have successfully added a switch to Node Red UI. Open the Node Red UI URL in the browser i.e. 192.168.0.30:1880/ui. Let’s have a look on our very first control switch 😎
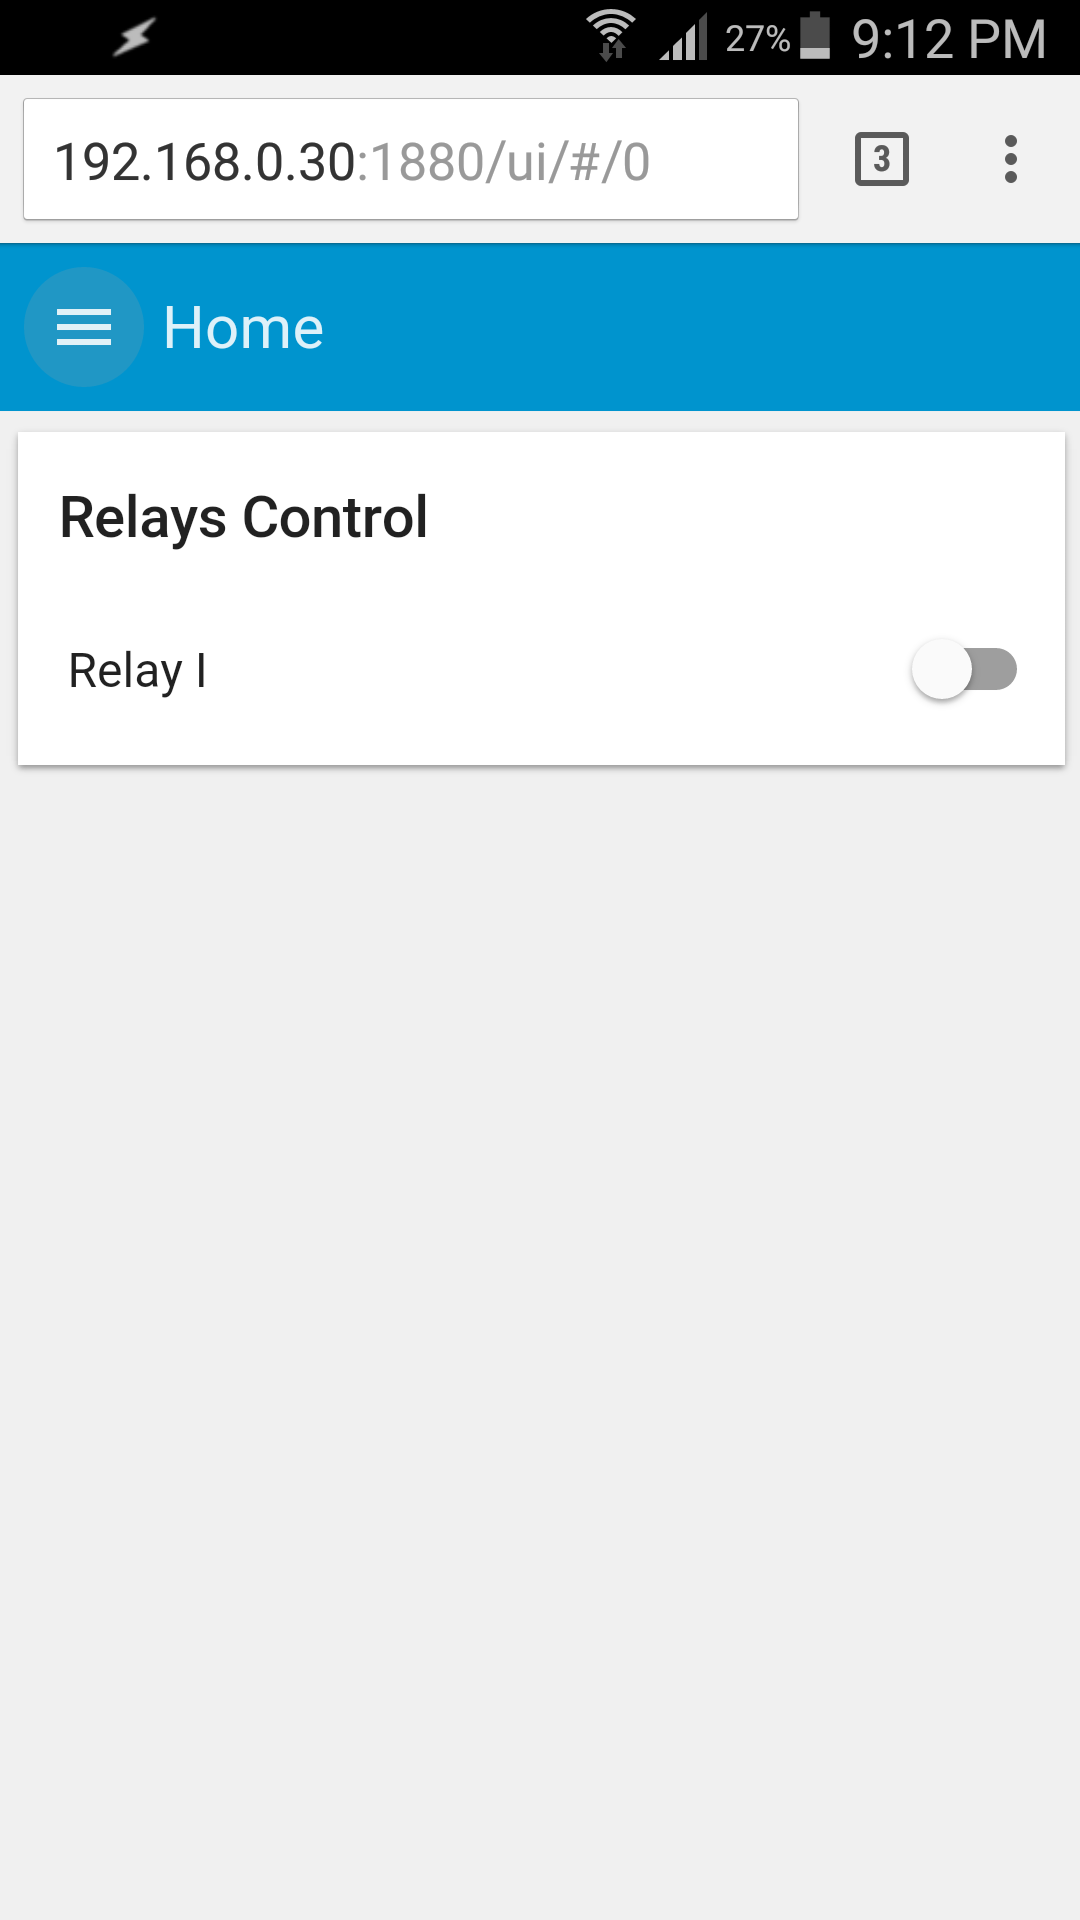
And How can I forget, The User Interface in mobile phone browser 😉 .
Try this tutorial and Let me know the results, It will be pleasure to help you out if something is not working while following this tutorial. Soon I’ll update the code and it’s user friendly API, stay tuned and good luck 8-).
[…] Add server settings according to this post […]
Suggestion required
I want to control 5 relay switch , three sensor and send data to gateway over the WiFi. so which micro-controller do you think is suitable for this?
Thanks
It depends upon type of sensors you want to incorporate in your sensor node setup. However, You may use ESP8266 SMD or ESP8266 based Development boards such as NodeMCU or WeMos but it has only one ADC pin. You can attach ADC-1115, a 16 bit analog to digital converter and much more accurate. Moreover, follow few precautions such as USE GPIO-16 (D0 in NodeMCU) as input (because it may be connected to RST pin and using it as output may cause your sensor node reboot on switching), do not use GPIO-0 (D3 in NodeMCU) as INPUT (because of sensor output,… Read more »
Thanks for replay bro.can you please provide your email for further guidance Thanks
Contact us anytime at info[@]hobbytronics.com.pk (Remove[] from address).
The home automation system’s main job is to connect controlled devices together with a central hub or so-called digital-brain of the building management system. Different protocols and data flow algorithms involve in this process, and scientists/engineers working hard to refine them, due to which better solutions coming every next day. What we need to do is to leave space for up gradation, when a new system gets installed, because otherwise the whole system will need to be replaced, which can be costlier at times.